Deploying the WAPT agent for Windows
Two methods are available to deploy the waptagent.exe.
The first method is manual and the procedure must be applied on each machine.
The second one is automated and relies on a GPO.
Note
The waptagent.exe installer is available at https://srvwapt.mydomain.lan/wapt/waptagent.exe.
If you do not sign the waptagent.exe installer with a commercial
Code Signing certificate or a Code Signing certificate issued
by the Certificate Authority of your Organization
after having generated it, web browsers will show a warning message
when downloading the installer. To remove the warning message, you must
sign the .exe with a Code Signing certificate
that can be verified by a CA bundle stored in the machine’s certificate store.
Hint
When to deploy the WAPT agent manually?
Manual deployment method is efficient in these cases:
testing WAPT;
using WAPT in an organization with a small number of computers, etc;
Deploying waptagent.exe manually
Attention
This operation requires Local Administrator rights on the local computer.
Installing waptagent.exe
choose the language and click on Next to go to next step;
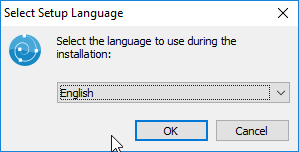
Choose the installation language
accept the license terms and click on Next to go to next step;
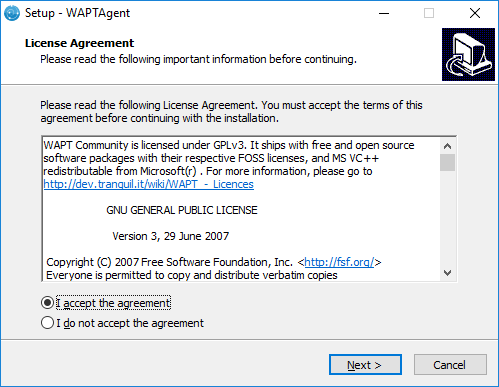
Accepting the EULA
choose the installation directory and click on Next to go to next step;

Select the installation folder for the WAPT agent
choose the additional parameters and click on Next to go to next step;
Hint
leave Force-reinstall VC++ enabled checked. If the option box is ticked it is because its installation is necessary.
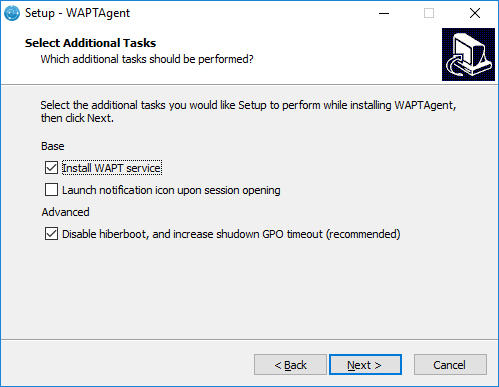
Choose the installer’s options
choose the WAPT repository and the WAPT Server and click on Next to go to next step;
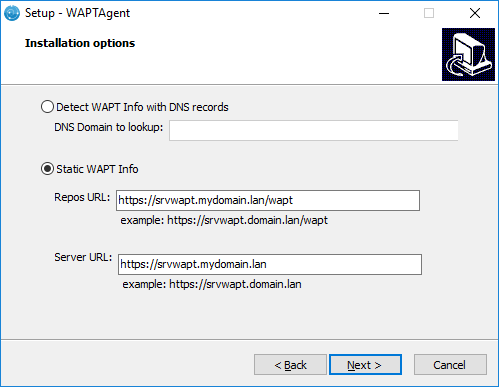
Choose the WAPT repository and server
install the WAPT agent by clicking on Install;
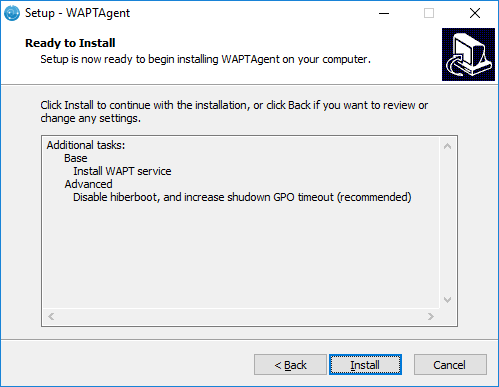
Summary of installation options
wait for the installation of the WAPT agent to finish, then click on Finish to exit;

Installation in progress
The installation of the WAPT agent is finished. With cmd.exe, launch a register to register the machine with the WAPT Server and an update to display the list of available WAPT packages.

End of WAPT agent installation
Note
tick Register this host on WAPT Server to register the computer on the WAPT inventory server;
tick Update package list from repository to update the list of available packages;
To manage your Organization’s WAPT clients, visit the documentation on using the WAPT console.
Automatically deploying the WAPT agents
Important
Technical pre-requisites
Advanced network and system administration knowledge is required to achieve this procedure. A properly configured network will ensure its success.
Hint
When to deploy the WAPT agent automatically? The following method is useful in these cases:
a large organization with many computers;
a Samba Active Directory or Microsoft Active Directory for which you have enough administration privileges;
the security and the traceability of actions are important to you or to your Organization;
or just simply, you prefer to act with your head instead of your feet ;)
Deploying the WAPT agents silently
Without waptdeploy
waptagent.exe is an InnoSetup installer, it can be executed with these silent switches:
waptagent.exe /VERYSILENT
Additional arguments available for waptdeploy
Options |
Description |
|---|---|
|
Domain in |
|
URL of the WAPT server in |
|
URL of the WAPT repository in |
|
Group of WAPT packages to install by default. |
|
Value of |
|
Certificate bundle for https connections (to be defined by |
|
Certificate bundle for verifying package signatures |
Hint
The iss file for the InnoSetup installer is available here:
C:\Program Files (x86)\wapt\waptsetup\waptsetup.iss.
You may choose to adapt it to your specific needs. Once modified, you’ll just have to recreate a waptagent.
To learn more about the options available with InnoSetup, visit this documentation.
With waptdeploy
waptdeploy is a small binary that:
checks the version of the WAPT agent;
downloads via https the waptagent.exe installer;
launches the silent installer with arguments (checked options defined during the compilation of the WAPT agent);
/VERYSILENT /MERGETASKS= ""useWaptServer""
updates the WAPT Server with the WAPT agent status (WAPT version, package status);
Note
waptdeploy must be started as Local Administrator, that is why we advise you to use a GPO.
Creating a GPO to deploy the WAPT agents
Download waptdeploy.exe by visiting:
https://wapt.tranquil.it/wapt/releases/latest/waptdeploy.exe.
Creating the GPO
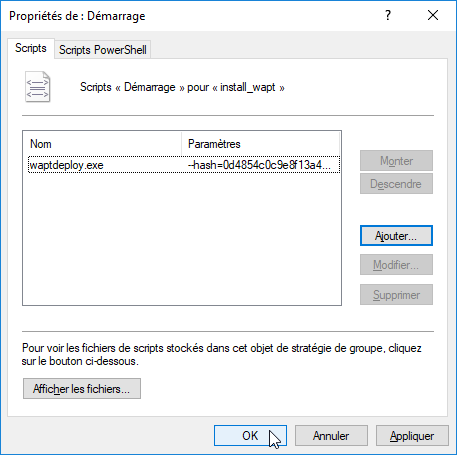
create a new group strategy called install_wapt on the Active Directory server (Microsoft or Samba-AD);
add a new strategy: ;
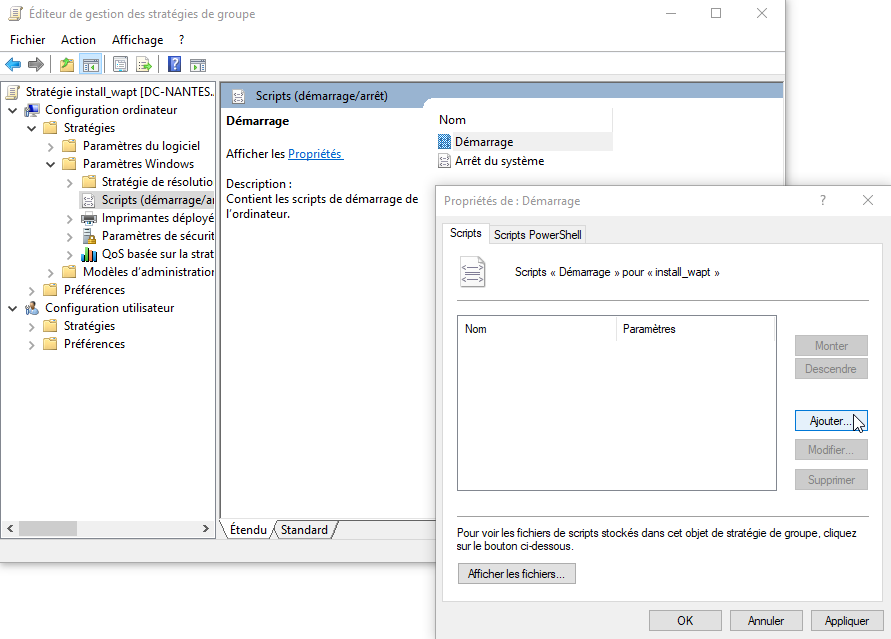
Creating a group strategy to deploy the WAPT agent
click on Browse to select the
waptdeploy.exescript;
Finding the waptdeploy.exe file on your computer
copy
waptdeploy.exein the destination folder;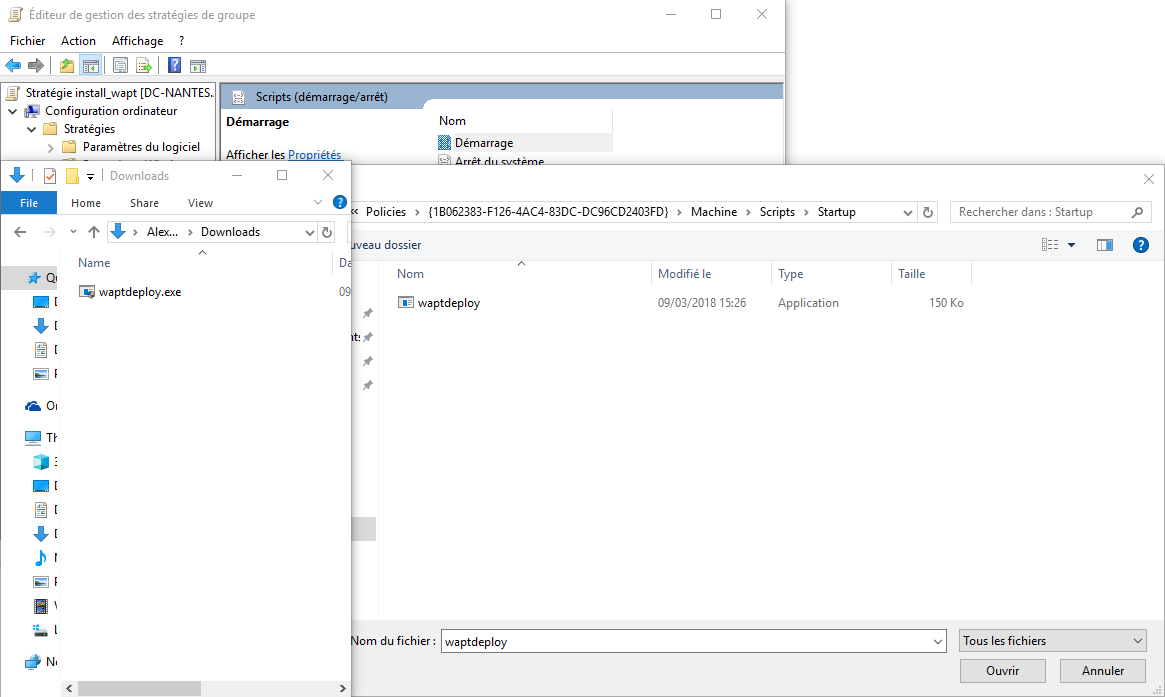
Selecting the waptdeploy.exe script
click on Open to import the
waptdeploy.exescript;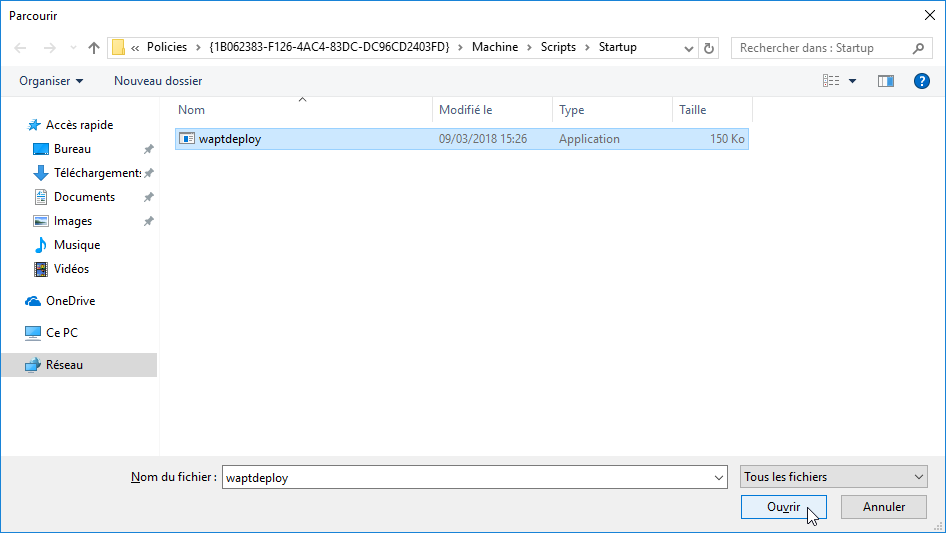
Selecting the waptdeploy.exe script
click on Open to confirm the importation of the waptdeploy binary;
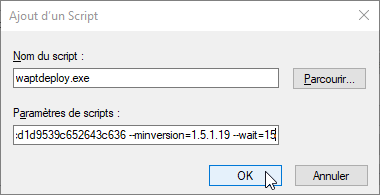
Passing arguments
Hint
Starting with version 1.3.7, it is necessary to provide the checksum
of the waptagent.exe as an argument to the waptdeploy GPO.
This will prevent the remote machine from executing an erroneous/ corrupted waptagent binary.
--hash="checksum du WaptAgent"--minversion=1.5.1.23 --wait=15
Note
Parameters and waptagent.exe checksum to use for the waptdeploy GPO are available on the WAPT Server by visiting https://srvwapt.mydomain.lan.
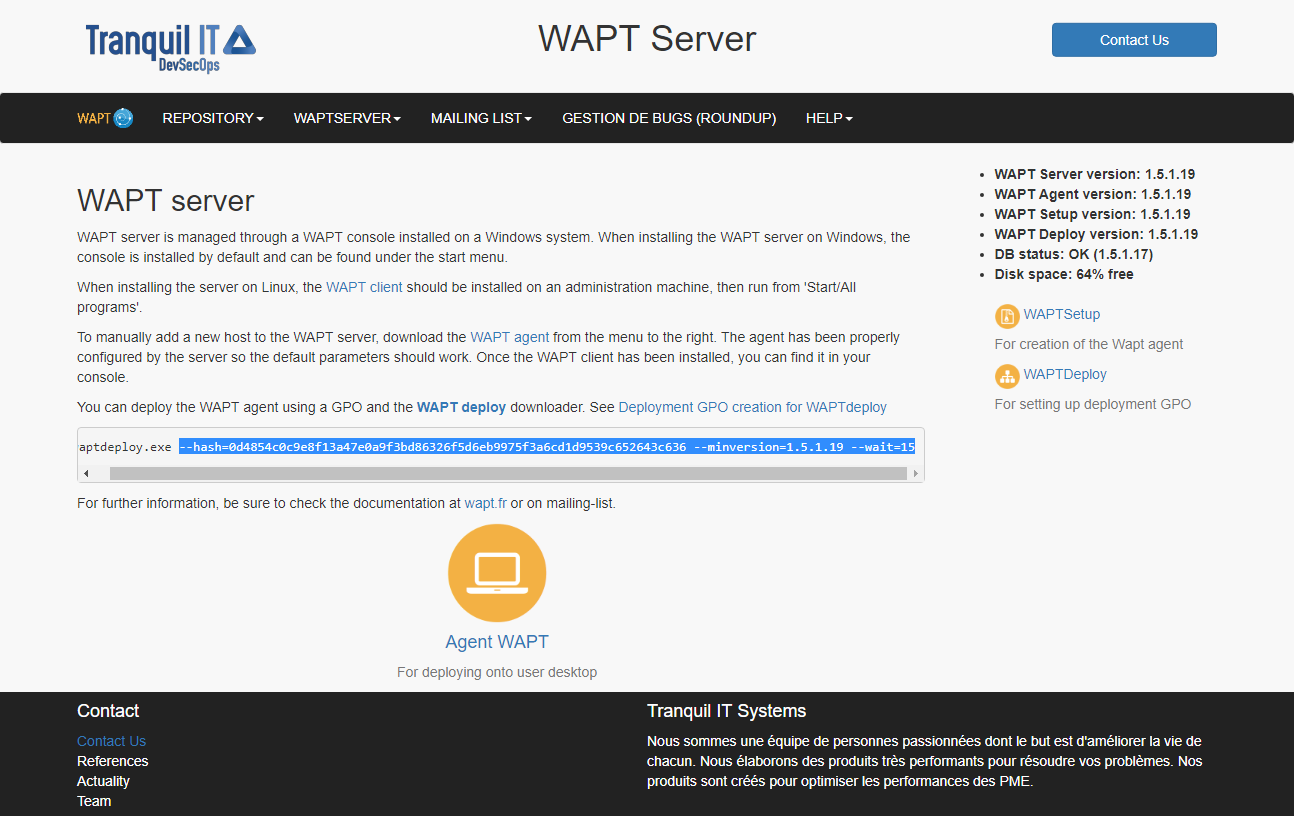
Web console of the WAPT Server
Additional arguments available for waptdeploy
Options |
Value |
Description |
|---|---|---|
|
Forces the installation of waptagent.exe even if the WAPT agent is already installed. |
|
|
Gives explicitly the WAPT agent URL/path to use to download the WAPT agent |
|
|
autorunTray,installService,installredist2008,autoUpgradePolicy |
Sets waptagent installation tasks |
|
10 |
Timeout for installing the WAPT agent. |
|
/dnsdomain=mydomain.lan /wapt_server= /repo_url= |
Passing additional parameters to waptagent |
--hash="43254648348435423486"--minversion=1.8.1 --waptsetupurl=http://srvwapt.mydomain.lan/wapt/waptagent.exe --wait=10
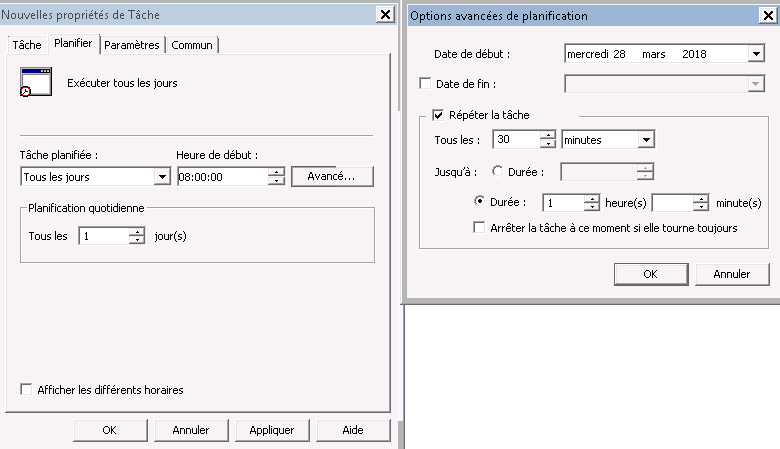
Launching waptdeploy with a scheduled task
For waptdeploy to work best, you may execute the GPO upon computer shutdown;
You may also choose to launch waptdeploy using a scheduled task that has been set by GPO.
Hint
This method is particularly effective for deploying WAPT on workstations when the network is neither available on starting up or shutting down.
The method consists of using a GPO to copy waptdeploy.exe
and waptagent.exe:
Source :
\mydomain.lan\netlogon\waptagent.exeDestination :
C:\windows\temp\waptagent.exe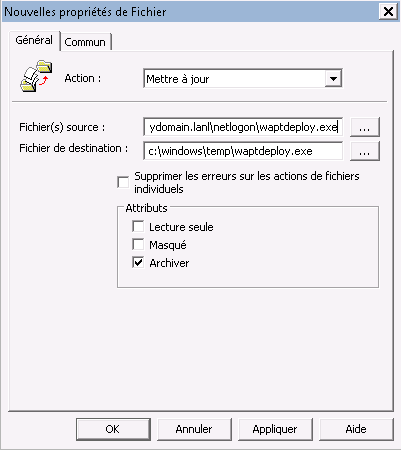
WAPT agent installation progress
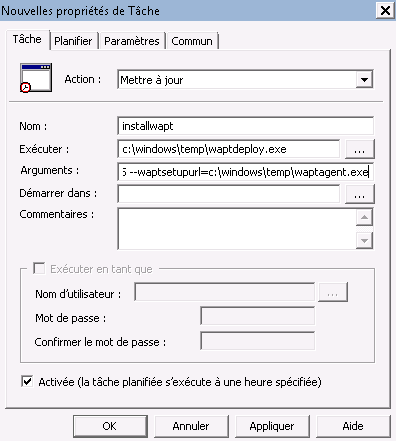
copy
waptdeploy.exeandwaptagent.exein the netlogon share of your Active Directory Server;then create a GPO to set up a scheduled task that will launch waptdeploy:
C:\windows\temp\waptdeploy.exe
Arguments:
--hash="43254648348435423486"--minversion=1.5.1.23 --waptsetupurl=C:\windows\temp\waptagent.exe --wait=10
Attention
The hash and min_version arguments will change in reality
compared to the documentation as WAPT continues to improve.
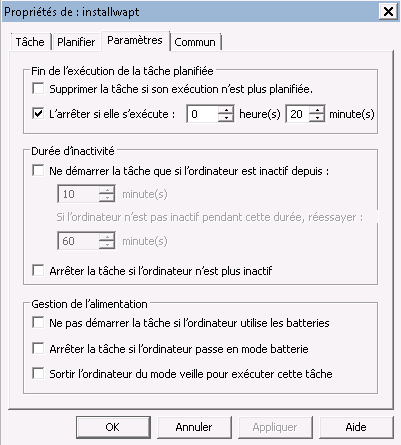
Task installation properties