Upgrade WAPT Server
Si votre serveur WAPT est une machine virtuelle, prenez un instantané de la VM. De cette façon, vous pourrez revenir en arrière facilement dans le cas rare où la mise à jour échoue.
Avertissement
Après chaque mise à jour du serveur, mettez à jour votre console puis regénérer l’agent WAPT.
Avant de mettre à niveau le serveur WAPT, veuillez consulter le tableau de compatibilité de mise à niveau suivant :
Vers WAPT 2.3 |
|
|---|---|
Depuis WAPT 1.8.2 |
|
Depuis WAPT 2.0 |
|
Depuis WAPT 2.1 |
|
Depuis WAPT 2.2 |
|
Avertissement
Si vous mettez à niveau à partir d’une version antérieure à WAPT 2.1, le processus d’activation de licence a changé.
Changement de l’édition WAPT (Community, Discovery, Enterprise)
WAPT Community is no longer supported. If you want to upgrade from WAPT 1.8.2 Community you can upgrade to WAPT Discovery or WAPT Enterprise. Please note that WAPT Discovery is limited to 300 clients.
Pour mettre à niveau WAPT Community vers WAPT Enterprise, suivez la documentation standard 1.8.2 to 2.3 upgrade documentation.
Le serveur effectuera les modifications appropriées.
Pour mettre à niveau WAPT Discovery vers WAPT Enterprise, il suffit de modifier votre licence.
Si votre licence Enteprise expire, WAPT basculera sur l’édition Discovery. Si vous utilisez WAPT Discovery et que vous avez plus de 300 ordinateurs dans votre inventaire, la console WAPT cessera de fonctionner et ne vous donnera que la possibilité de supprimer des entrées d’ordinateur de l’inventaire. La console WAPT redeviendra opérationnelle lorsque l’inventaire repassera sous la limite des 300 ordinateurs.
Minor upgrade
Mise à niveau de WAPT de 2.3 à la dernière 2.3
To do a minor upgrade please follow the procedure corresponding to your server operating system.
Mettez à jour la distribution sous-jacente et mettez à niveau le serveur WAPT.
export DEBIAN_FRONTEND=noninteractive
apt update && apt upgrade -y
apt install tis-waptserver tis-waptsetup -y
unset DEBIAN_FRONTEND
Lancer l’étape de post-configuration étape de post-configuration
Une fois terminé, votre serveur est prêt.
Mettez à jour la distribution sous-jacente et mettez à niveau le serveur WAPT.
yum update -y
yum install tis-waptserver tis-waptsetup -y
Lancer l’étape de post-configuration étape de post-configuration
Une fois terminé, votre serveur est prêt.
Télécharger et exécuter
waptserversetup.exe.
Attention
L’installation du serveur WAPT doit être effectuée à l’aide d’un compte Administrateur local sur l’hôte
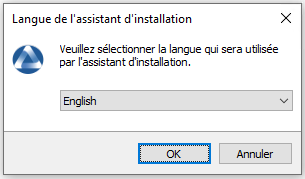
Choisir la langue de l’installeur WAPT.
Acceptez la licence publique GNU et cliquez sur Suivant pour passer à l’étape suivante.
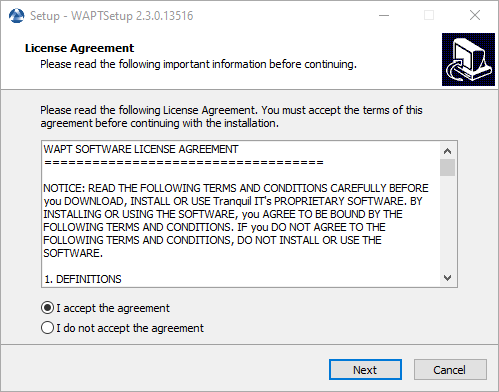
Acceptez la licence publique GNU et cliquez sur Suivant pour passer à l’étape suivante.
Choisissez une tâche supplémentaire (laissez la valeur par défaut).
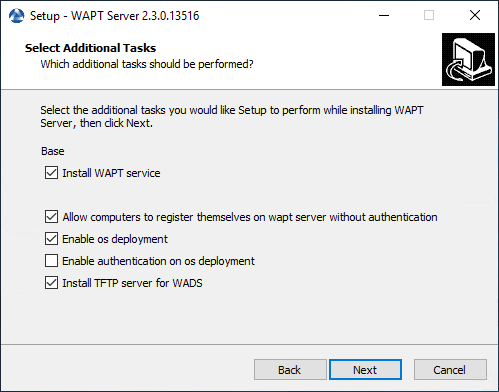
Choix des options du programme d’installation pour le déploiement du serveur WAPT
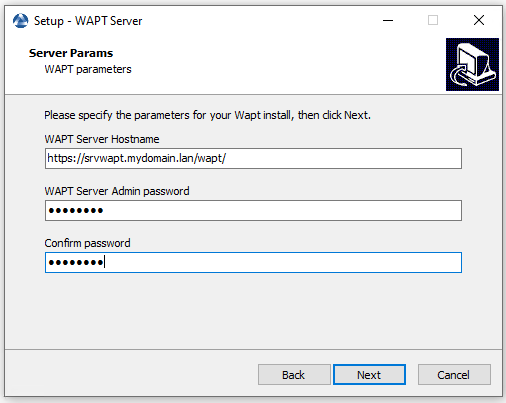
Ne pas modifier le mot de passe du serveur WAPT (si cela n’est pas nécessaire).
Cliquez sur le bouton Installer pour lancer l’installation, attendez que l’installation soit terminée.
Cliquez sur Terminer pour fermer la fenêtre.
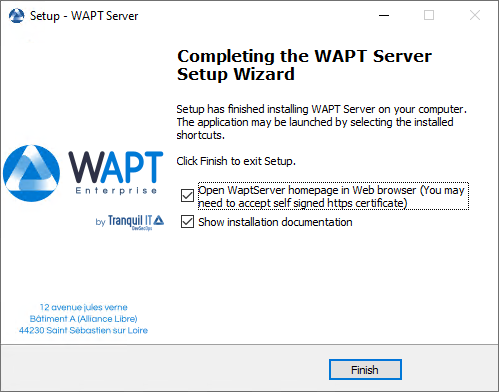
Une fois terminé, votre serveur est prêt.
Mise à niveau de WAPT de 2.x à 2.3
Note
Avant de procéder à la mise à niveau, lisez les exigences d’installation.
WAPT 2.3 needs PostgreSQL 10 or above. If you have upgraded from a older Debian or Ubuntu version with PostgreSQL 9.6, be sure to follow the OS documentation to upgrade PostgreSQL to latest version.
Tout d’abord, mettez à jour la distribution.
apt update && apt upgrade -y
apt install apt-transport-https lsb-release gnupg
Ajouter ou mettre à jour le dépôt de paquets Debian, importer la clé GPG du dépôt et installer les paquets du serveur WAPT.
wget -O - https://wapt.tranquil.it/$(lsb_release -is)/tiswapt-pub.gpg | apt-key add -
echo "deb https://wapt.tranquil.it/$(lsb_release -is)/wapt-2.3/ $(lsb_release -c -s) main" > /etc/apt/sources.list.d/wapt.list
Mettre à jour le dépôt et installer les paquets.
export DEBIAN_FRONTEND=noninteractive
apt update
apt install tis-waptserver tis-waptsetup -y
unset DEBIAN_FRONTEND
Lancer l’étape de post-configuration étape de post-configuration
Tout d’abord, mettez à jour la distribution.
yum update -y
yum install epel-release redhat-lsb-core -y
Ajouter ou mettre à jour le dépôt de paquets Debian, importer la clé GPG du dépôt et installer les paquets du serveur WAPT.
RH_VERSION=$(cat /etc/system-release-cpe | awk -F: '{ print $5}')

cat > /etc/yum.repos.d/wapt.repo <<EOF
[wapt]
name=WAPT Server Repo
baseurl=https://wapt.tranquil.it/redhat${RH_VERSION}/wapt-2.3/
enabled=1
gpgcheck=1
EOF

wget -q -O /tmp/tranquil_it.gpg "https://wapt.tranquil.it/redhat${RH_VERSION}/RPM-GPG-KEY-TISWAPT-${RH_VERSION}"; rpm --import /tmp/tranquil_it.gpg
Et enfin, mettre à jour le serveur WAPT.
yum install tis-waptserver tis-waptsetup cabextract -y
Télécharger et exécuter
waptserversetup.exe.Choisir la langue de l’installeur WAPT.
Acceptez la licence publique GNU et cliquez sur Suivant pour passer à l’étape suivante.
Acceptez la licence publique GNU et cliquez sur Suivant pour passer à l’étape suivante.
Choisissez le répertoire d’installation (laissez la valeur par défaut) et cliquez sur Suivant pour passer à l’étape suivante.
Sélectionnez une tâche supplémentaire si nécessaire.
Choix des options du programme d’installation pour le déploiement du serveur WAPT
Modifiez le mot de passe du serveur WAPT si nécessaire, puis appuyez sur Suivant.
Cliquez sur le bouton Installer pour lancer l’installation, attendez que l’installation soit terminée.
Cliquez sur Terminer pour fermer la fenêtre.
Attention
NE PAS utiliser la console WAPT sur le serveur WAPT. N’installez PAS et n’exécutez pas vos outils de développement de paquets WAPT sur le serveur WAPT.
Le serveur WAPT sur votre serveur ou station de travail Windows est prêt.
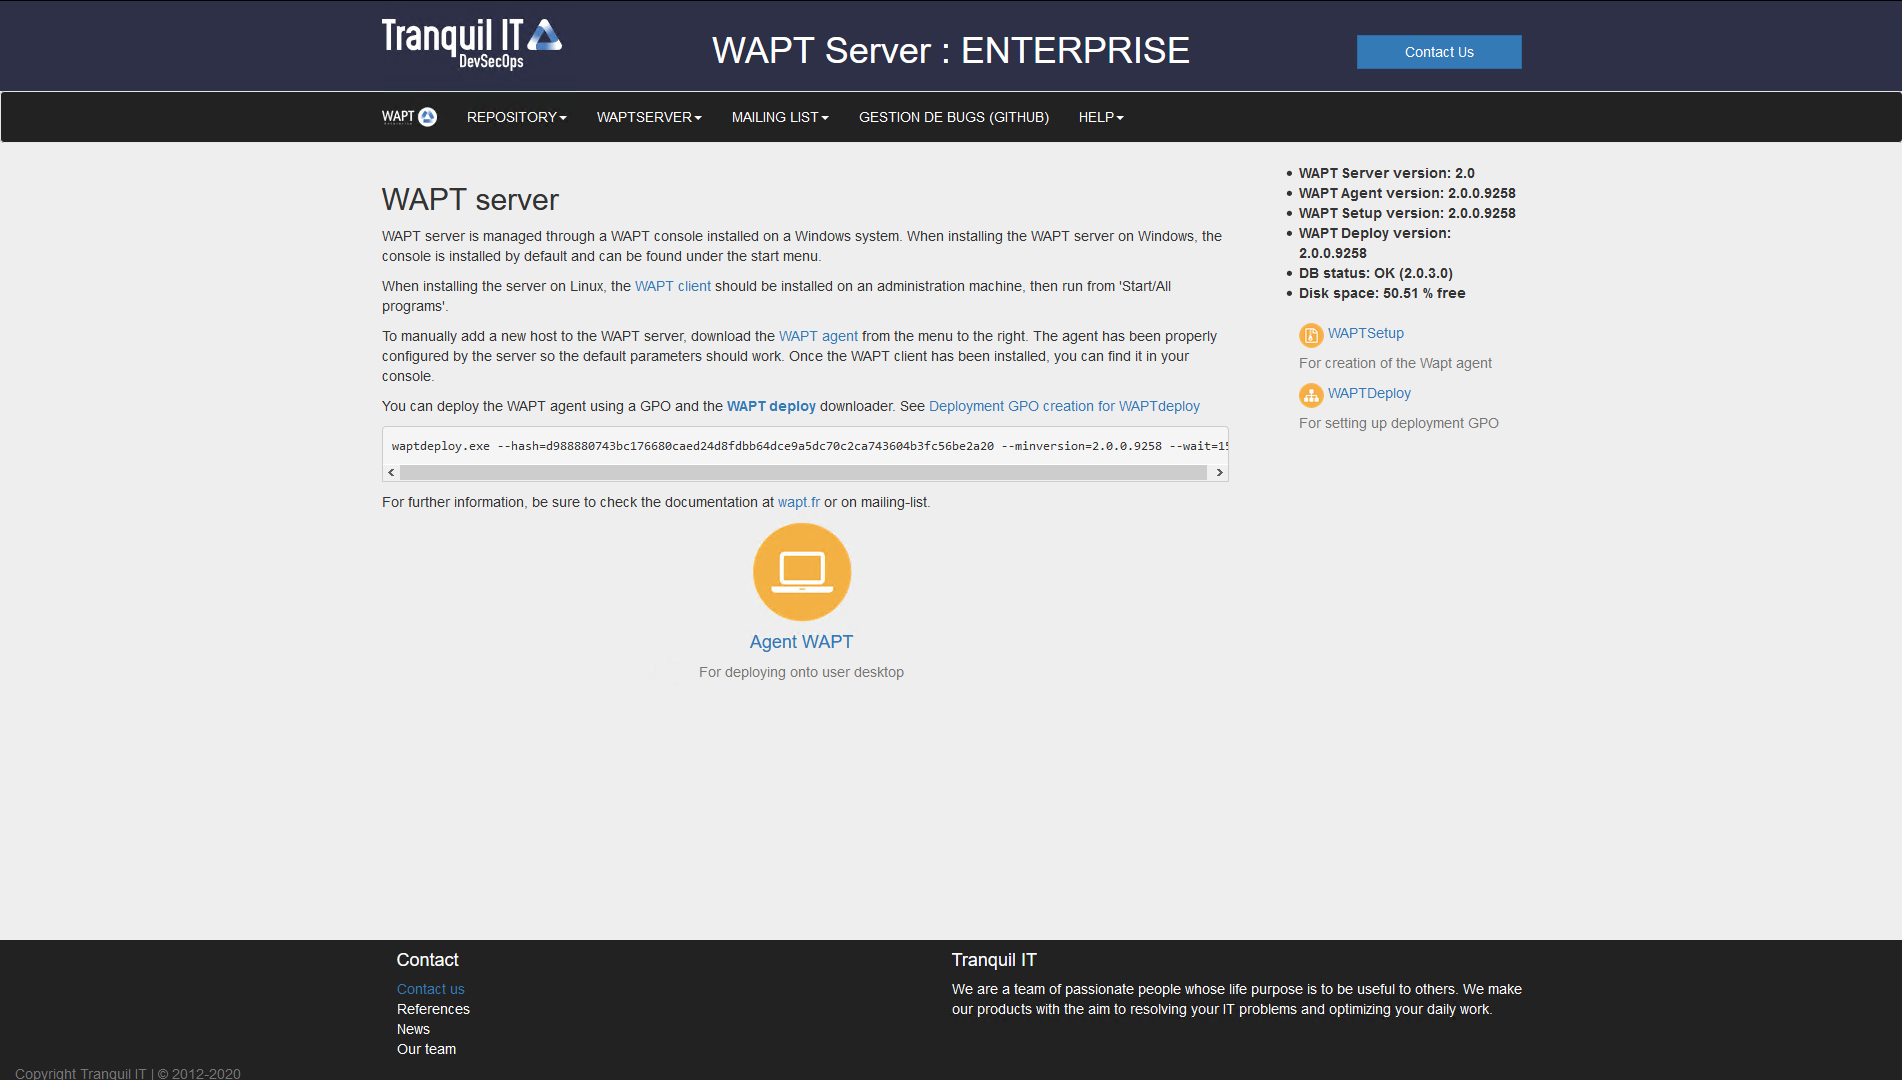
L’interface du serveur WAPT dans un navigateur web
Votre serveur est maintenant prêt. Vous pouvez maintenant consulter la documentation sur Installation de la console de gestion WAPT.
Mise à niveau de WAPT de 1.8.2 à 2.3
The changement between WAPT 1.8.2 (not possible from a older version, please upgrade to 1.8.2 beforehand) and 2.3 are numerous. First of all, 1.8.2 was in Python2, we changed to Python3. A lot of new features are available too (essentially in Enterprise version).
Before upgrading
Ensure that installation requirements are met.
Backup your WAPT Private and Public certificates which allows you to deploy your WAPTAgent and packages. Usually, it is located in C:\private on your computer where the WAPT Console is set. If you don’t remember what this key is please refer to the section about generating the Administrator’s certificate for signing WAPT packages for better understandment.
In this documentation, your WAPT certificate’s name will be wapt-private.crt.
Upgrading
Note
Si vous êtes sous Debian9 Stretch, vous devez d’abord mettre à niveau vers Debian10 Buster avant de mettre à niveau vers WAPT 2.x. Le Serveur WAPT 2.x n’est pas disponible pour Debian9.
Il est même recommandé de mettre à niveau vers Debian 11 Bullseye. Dans ce cas, il faut passer de Debian 9 => Debian 10 => Debian 11.
Tout d’abord, mettez à jour la distribution.
apt update && apt upgrade -y
apt install apt-transport-https lsb-release gnupg
Mettre à jour le dépôt et installer les paquets.
wget -O - https://wapt.tranquil.it/$(lsb_release -is)/tiswapt-pub.gpg | apt-key add -
echo "deb https://wapt.tranquil.it/$(lsb_release -is)/wapt-2.3/ $(lsb_release -c -s) main" > /etc/apt/sources.list.d/wapt.list
Mettre à jour le dépôt et installer les paquets.
export DEBIAN_FRONTEND=noninteractive
apt update
apt install tis-waptserver tis-waptsetup -y
unset DEBIAN_FRONTEND
Lancer l’étape de post-configuration.
Tout d’abord, mettez à jour la distribution.
yum update -y
yum install epel-release -y
Ajouter ou mettre à jour le dépôt de paquets Debian, importer la clé GPG du dépôt et installer les paquets du serveur WAPT.
RH_VERSION=$(cat /etc/system-release-cpe | awk -F: '{ print $5}')

cat > /etc/yum.repos.d/wapt.repo <<EOF
[wapt]
name=WAPT Server Repo
baseurl=https://wapt.tranquil.it/redhat${RH_VERSION}/wapt-2.3/
enabled=1
gpgcheck=1
EOF

wget -q -O /tmp/tranquil_it.gpg "https://wapt.tranquil.it/redhat${RH_VERSION}/RPM-GPG-KEY-TISWAPT-${RH_VERSION}"; rpm --import /tmp/tranquil_it.gpg
Et enfin, mettre à jour le serveur WAPT.
yum install tis-waptserver tis-waptsetup cabextract -y
Lancer l’étape de post-configuration.
Télécharger et exécuter
waptserversetup.exe.Choisir la langue de l’installeur WAPT.
Acceptez la licence publique GNU et cliquez sur Suivant pour passer à l’étape suivante.
Acceptez la licence publique GNU et cliquez sur Suivant pour passer à l’étape suivante.
Si un ancien dossier d’installation est trouvé, ce message apparaît. Cliquez sur Oui pour passer à l’étape suivante.
Sélectionnez une tâche supplémentaire si nécessaire.
Choix des options du programme d’installation pour le déploiement du serveur WAPT
Modifiez le mot de passe du serveur WAPT si nécessaire, puis appuyez sur Suivant.
Cliquez sur le bouton Installer pour lancer l’installation, attendez que l’installation soit terminée.
Cliquez sur Terminer pour fermer la fenêtre.
L’interface du serveur WAPT dans un navigateur web
Le serveur WAPT sur votre serveur ou station de travail Windows est prêt.
Attention
NE PAS utiliser la console WAPT sur le serveur WAPT. N’installez PAS et n’exécutez pas vos outils de développement de paquets WAPT sur le serveur WAPT.
Your WAPT Server is now ready.
The WAPT management Console
To download the waptsetup.exe file, point your web browser to your waptserver url https://srvwapt.mydomain.lan, then click on the WAPTSetup link on the right-hand side of the WAPT Server web page.
The WAPT Server home page only provides basic server status information and the download link for the WAPT Console.
L’interface du serveur WAPT dans un navigateur web
Installing the WAPT Agent on the Administrator’s computer
Attention
If the WAPT Agent is not compiled and installed on your computer, you need to run de WAPT Agent installer to open and configure the WAPT Console.
Start the executable installer as Local Administrator on the Administrator’s workstation.
Choisir la langue de l’installeur WAPT.
Acceptez la licence publique GNU et cliquez sur Suivant pour passer à l’étape suivante.
Acceptez la licence publique GNU et cliquez sur Suivant pour passer à l’étape suivante.
Choisissez une tâche supplémentaire (laissez la valeur par défaut).
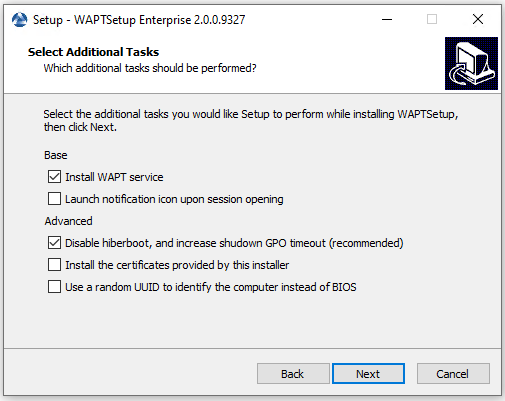
Choosing the WAPT Agent installer options
Settings |
Description |
Default value |
|---|---|---|
Install WAPT service checkbox |
Enables the WAPT service on this computer. |
Checked |
Launch notification icon upon session opening checkbox |
Launches the WAPT Agent in systray on host startup. |
Not checked |
Disable hiberboot, and increase shutdown GPO timeout (recommended) checkbox |
Disables Windows fast startup for stability, it increases the timeout for the WAPT Exit utility. |
Checked |
Install the certificates provided by this installer checkbox |
Installs Tranquil IT certificate on this computer. |
Not checked |
Use a random UUID to identify the computer instead of BIOS checkbox |
For more information, check the documentation on BIOS UUID bugs |
Not checked |
Set up the WAPT Server URL.
Check Static WAPT Informations and set:
WAPT repository URL: http://srvwapt.mydomain.lan/wapt.
WAPT Server URL: https://srvwapt.mydomain.lan.
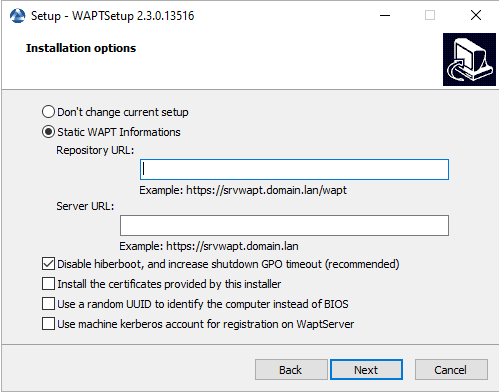
Choosing the WAPT repository and the WAPT Server
Choose the WAPT repository and the WAPT Server; click Next.
Check Don’t change current setup, then click Next.

The WAPT repository and the WAPT Server are already set
Get a summary of the WAPT Console installation.
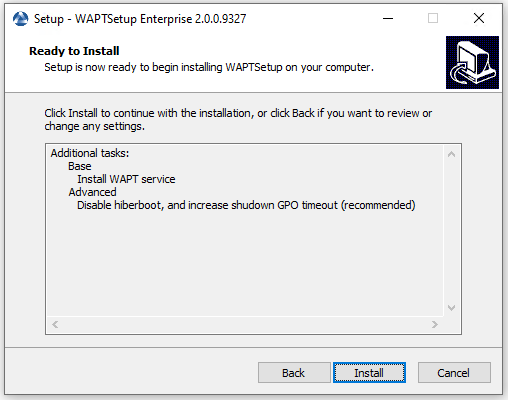
Summary of the WAPT installation abstract
Click Install to launch the installation, wait for the installation to complete, then click on Finish (leave default options).
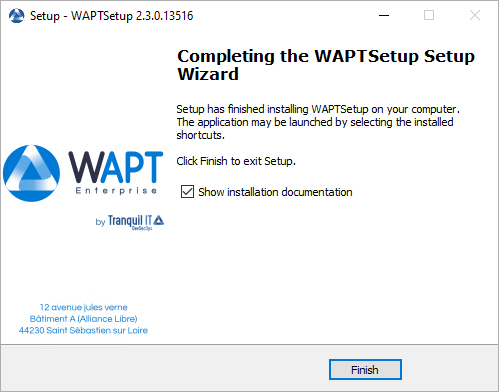
Uncheck Show installation documentation.
Starting the WAPT Console
Launch the WAPT Console:
By looking for the binary.
C:\Program Files (x86)\wapt\waptconsole.exeOr using the Start Menu.
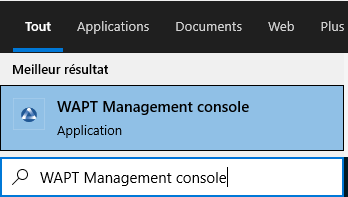
Launching the WAPT Console from the Windows Start Menu
Log into the WAPT Console with the SuperAdmin login and password.
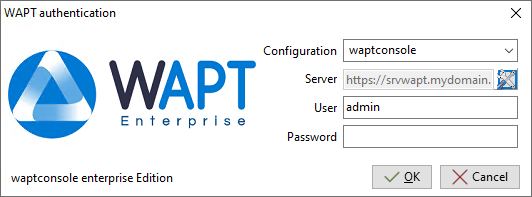
The WAPT Console authentication window
If you have any issue logging into the WAPT Console, please refer to the FAQ: Message d’erreur à l’ouverture de la console.
It is recommended to launch the WAPT Console with a Local Administrator account to enable local debugging of WAPT packages.
For Enterprise version, it is possible to authenticate with Active Directory.
Danger
After the upgrade, please be sure your certificate (in this documentation wapt-private.crt) is still present at your WAPT install location : C:\Program File (x86)\wapt\ssl
Since you come from WAPT 1.8.2 which was in python2, you’ll have to re-sign all your WAPT Packages using the WAPT Console, or using the command line (only if you encounter package size issue with the WAPT Console way).
Re-signing Host packages
Use the Administrator’s certificate for re-signing packages.
Select all host.
Right-click on the selected hosts.
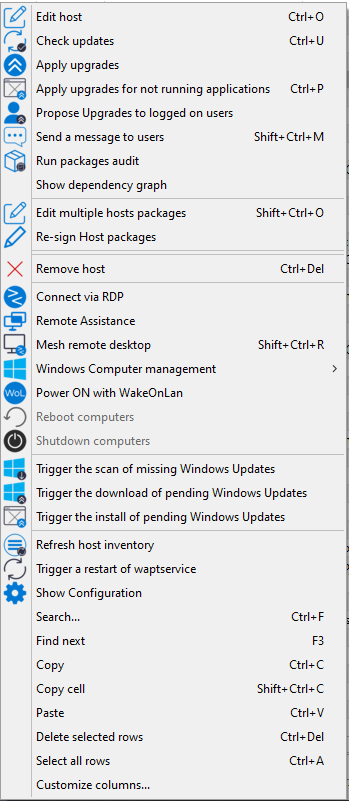
Select Re-sign Host packages.
Confirm re-signing the selected hosts.
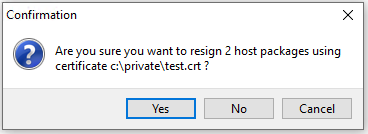
Modal window for confirming re-signing the selection of hosts
Then, enter you private key password.
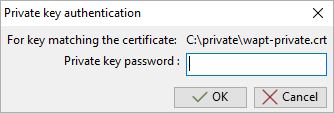
Entering the password for unlocking the private key in the WAPT Console
The selected WAPT host packages are now all re-signed using the new cryptographic method required with Python3.
Re-signing other types of WAPT package
Open the repositories in your WAPT Console.
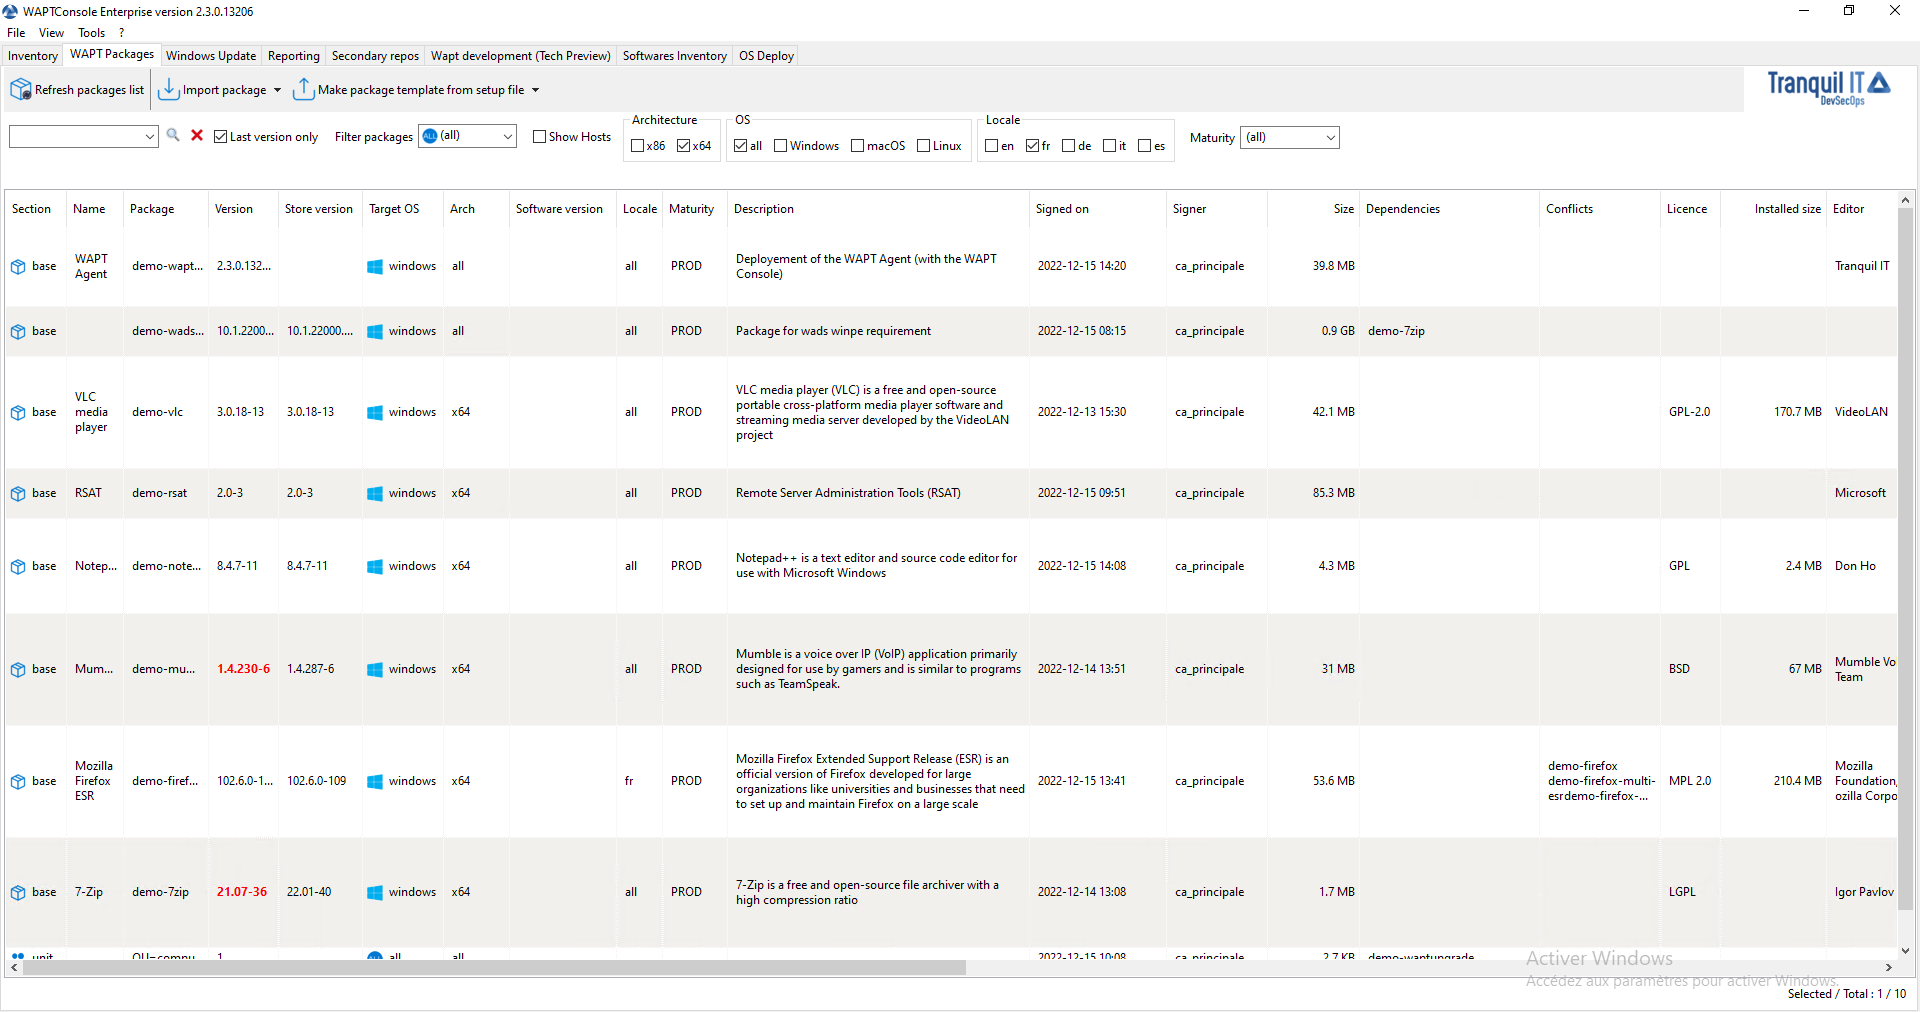
Window showing the repositories available on the WAPT Console
Select all packages in the repository, then right-click on the selection.
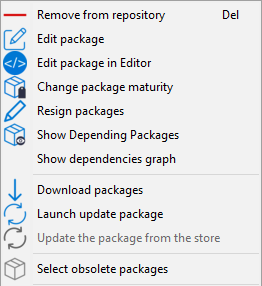
Menu options for repositories
Select Re-sign packages.
To launch the signature process, click on Re-sign packages.
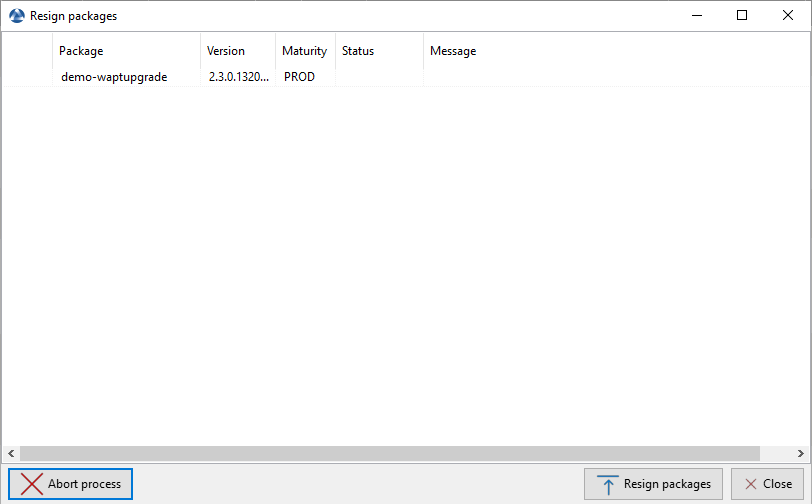
Window for re-signing WAPT packages
After processing, which may take some time, all packages will have been re-signed.
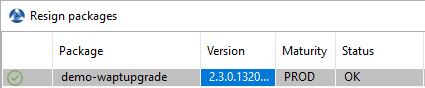
Signature processing has ended successfully
Attention

If the error Access violation appear it may mean that the WAPT package is too big.
You can resign this packages using the command line.
And if it’s still not working, you can still manually edit the package and visit this procedure for signing large WAPT packages.