The WAPT Server having been successfully installed, now we will install the WAPT Console.
1. How to install the management WAPT console
The WAPT Console is installed along side the WAPT Agent. Thus you first need to install the WAPT Agent on you management machine, please refer to WAPT Agent documentation On Windows and macOS it is installed by default with WAPT Agent (but not configured by default), on Linux it is installed through an extra package.
Managing WAPT is done mainly via the WAPT Console installed on the Administrator’s workstation.
It is recommended that the Administrator’s computer be joined to the Organization’s Active Directory.
The host name of the Administrator’s workstation MUST NOT be longer than 15 characters. This is a limit of sAMAccountName attribute in Active Directory.
The Administrator’s computer will become critical for WAPT administration and WAPT package testing.
If DNS records are properly configured, you should be able to access the WAPT web interface by visiting https://srvwapt.mydomain.lan. This web page is now protected by a password, please use the admin account set during server installation.
The WAPT Console is supported on Windows, Linux and macOS.
Some features, like WinPE pre-boot environement creation for WADS Windows deployment is not available on Linux and macOS. The Linux and macOS console support light and dark mode.
Warning
The WAPT Console MUST NOT be installed on the WAPT Server.
The WAPT Console MUST be installed on the admin workstation from which you manage your network.
1.1. Installing and starting WAPT Console
The WAPT Console is supported on Windows, Linux and macOS. Please choose your client OS.
The WAPT Console is included by default in the WAPT Agent installer.
Warning
If the WAPT Agent is not compiled and installed on your computer, you need to run de WAPT Agent installer to open and configure the WAPT Console.
Start the executable installer as Local Administrator on the Administrator’s workstation.
Choose the language for the WAPT installer.
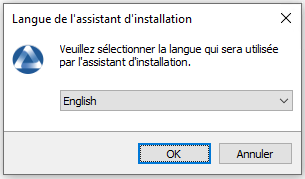
Click on OK to go on to the next step.
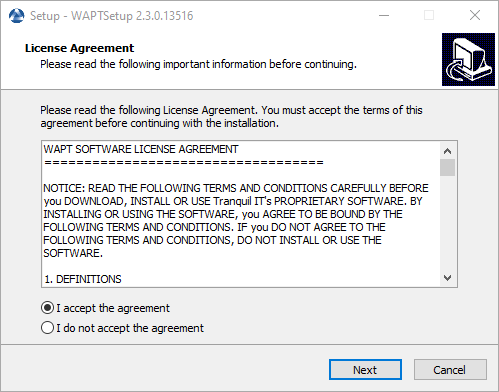
Accept the licence terms and click on Next to go to next step.
Choose additional configuration tasks (leave the default if not sure).
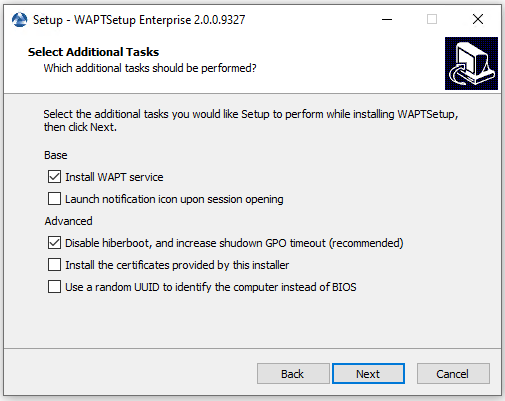
Choosing the WAPT Agent installer options
Settings |
Description |
Default value |
|---|---|---|
Install WAPT service checkbox |
Enables the WAPT service on this computer. |
Checked |
Launch notification icon upon session opening checkbox |
Launches the WAPT Agent in systray on host startup. |
Not checked |
Disable hiberboot, and increase shutdown GPO timeout (recommended) checkbox |
Disables Windows fast startup for stability, it increases the timeout for the WAPT Exit utility. |
Checked |
Install the certificates provided by this installer checkbox |
Installs Tranquil IT certificate on this computer. |
Not checked |
Use a random UUID to identify the computer instead of BIOS checkbox |
For more information, check the documentation on BIOS UUID bugs |
Not checked |
Set up the WAPT Server URL.
Choose Don’t change current setup. We configure the agent with initial configuration in WaptConsole.
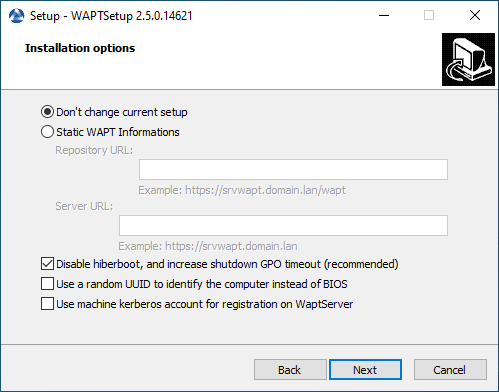
Click Next.
Check Don’t change current setup, then click Next.
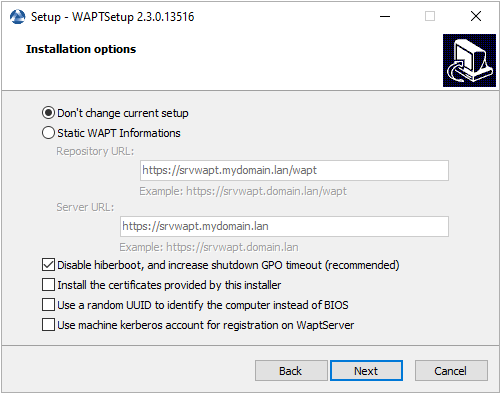
The WAPT repository and the WAPT Server are already set
Get a summary of the WAPT Console installation.
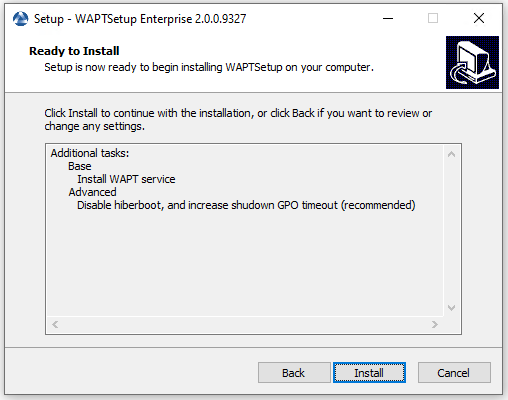
Summary of the WAPT installation abstract
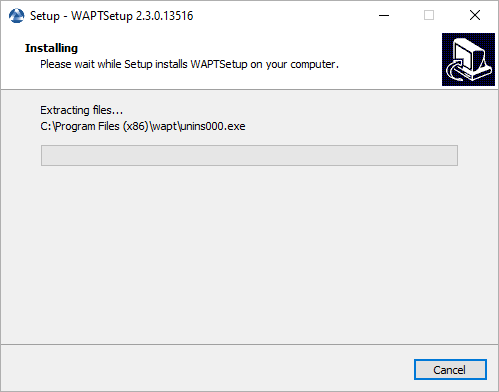
Click Install to launch the installation, wait for the installation to complete, then click on Finish (leave default options).
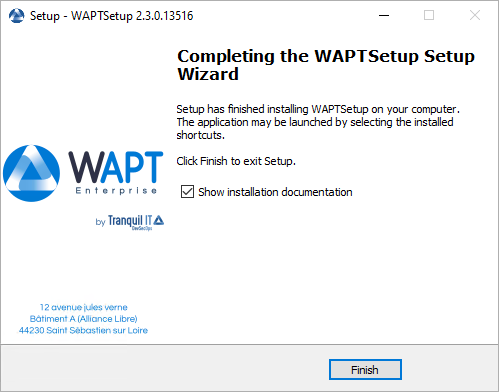
Uncheck Show installation documentation.
Launch the WAPT Console:
By looking for the binary.
C:\Program Files (x86)\wapt\waptconsole.exeOr using the Start Menu.
Launching the WAPT Console from the Windows Start Menu.
The WAPT Console is currently not included in the WAPT Agent installer.
Hint
The WAPT Agent for Debian has been tested on Debian 9, 10, 11 and 12.
The WAPT Agent for Ubuntu has only been tested on Ubuntu Bionic and Ubuntu Focal.
Update the underlying distribution and check that apt https transport is installed
sudo apt update && apt upgrade -y
sudo apt install apt-transport-https lsb-release gnupg -y
Retrieve the key .gpg, add it to the Tranquil IT repository and install the WAPT Agent.
bash -c 'wget -qO- https://wapt.tranquil.it/$(lsb_release -is)/tiswapt-pub-2026.gpg > /usr/share/keyrings/tiswapt-pub.gpg'
echo "deb [signed-by=/usr/share/keyrings/tiswapt-pub.gpg] https://wapt.tranquil.it/$(lsb_release -is)/wapt-2.6/ $(lsb_release -cs) main" | sudo tee /etc/apt/sources.list.d/wapt.list > /dev/null
Warning
breaking change: For WAPT versions earlier than 2.6.1.17654, please use this gpg key.
wget -qO- https://wapt.tranquil.it/$(lsb_release -is)/tiswapt-pub.gpg > /usr/share/keyrings/tiswapt-pub.gpg
export DEBIAN_FRONTEND=noninteractive
sudo apt update
sudo apt install tis-waptagent -y
unset DEBIAN_FRONTEND
Then you have to install the tis-waptagent-gui package, corresponding to your OS architecture.
Go to https://wapt.tranquil.it/wapt/releases/2.6/ and choose the right file.
# For example in WAPT 2.6.1.17831 for an AMD64 Debian
wget https://wapt.tranquil.it/wapt/releases/2.6/tis-waptagent-gui-2.6-328523ac-amd64.deb
sudo apt install desktop-file-utils -y
sudo apt install ./tis-waptagent-gui-2.6-328523ac-amd64.deb
Launch the WAPT Console:
By looking for the binary.
/opt/wapt/waptconsole.bin
Or using the Start Menu.

The WAPT Console startup on Linux
The WAPT Console is currently not included in the WAPT Agent installer.
Hint
The WAPT Agent for RedHat based system has been tested on RedHat 7/8/9 and derivatives on x86_64 platforms.
Update the underlying distribution.
yum update
Retrieve the key
.gpgand configure the WAPT repository.
RH_VERSION=$(cat /etc/system-release-cpe | awk -F: '{ print $5}')
wget -q -O /tmp/tranquil_it.gpg "https://wapt.tranquil.it/redhat${RH_VERSION}/RPM-GPG-KEY-TISWAPT-${RH_VERSION}"; rpm --import /tmp/tranquil_it.gpg
Warning
breaking change: For WAPT versions earlier than 2.6.1.16446, with redhat 8 please use this gpg key.
wget -q -O /tmp/tranquil_it.gpg "https://wapt.tranquil.it/redhat8/RPM-GPG-KEY-TISWAPT-8-old"; rpm --import /tmp/tranquil_it.gpg
cat > /etc/yum.repos.d/wapt.repo <<EOF [wapt] name = WAPT Server Repo baseurl = https://wapt.tranquil.it/redhat${RH_VERSION}/wapt-2.6/ enabled = True gpgcheck = True EOF
install the WAPT Agent using yum:
yum install tis-waptagent
Then you have to install the tis-waptagent-gui package, corresponding to your OS architecture.
Go to https://wapt.tranquil.it/wapt/releases/2.6/ and choose the right file.
# For example in WAPT 2.6.1.17831 for an x86_64 redhat_based
wget https://wapt.tranquil.it/wapt/releases/2.6/tis-waptagent-gui-2.6-328523ac.x86_64.rpm
sudo dnf install desktop-file-utils -y
sudo dnf install ./tis-waptagent-gui-2.6-328523ac.x86_64.rpm
Launch the WAPT Console:
By looking for the binary.
/opt/wapt/waptconsole.bin
Or using the Start Menu.
The WAPT Console startup on Linux
The WAPT Console in included by default in the WAPT Agent installation.
Warning
The WAPT agent for macOS is currently only available in the WAPT Enterprise version.
Hint
The WAPT Agent has only been tested on Intel architecture and Apple Silicon M1 processors:
Download and install the WAPT Agent (note: the hash string may change, to get the latest, point your browser on the url https://wapt.tranquil.it/wapt/releases/wapt-2.6/). Choose the version depending on your processor architecture (intel or m1):
For Example in WAPT |wapt_last_release|

# for mac m1
curl -OL http://wapt.tranquil.it/wapt/releases/wapt-|wapt_last_release|-|git_hash|/tis-waptagent-|wapt_last_release|-|git_hash|-macos-all-arm64.pkg
# for mac intel
curl -OL http://wapt.tranquil.it/wapt/releases/wapt-|wapt_last_release|-|git_hash|/tis-waptagent-|wapt_last_release|-|git_hash|-macos-all-x86_64.pkg

sudo installer -target / -pkg tis-waptagent*.pkg
You can get find the WAPT Console launcher in the WAPT folder in the Applications folder.
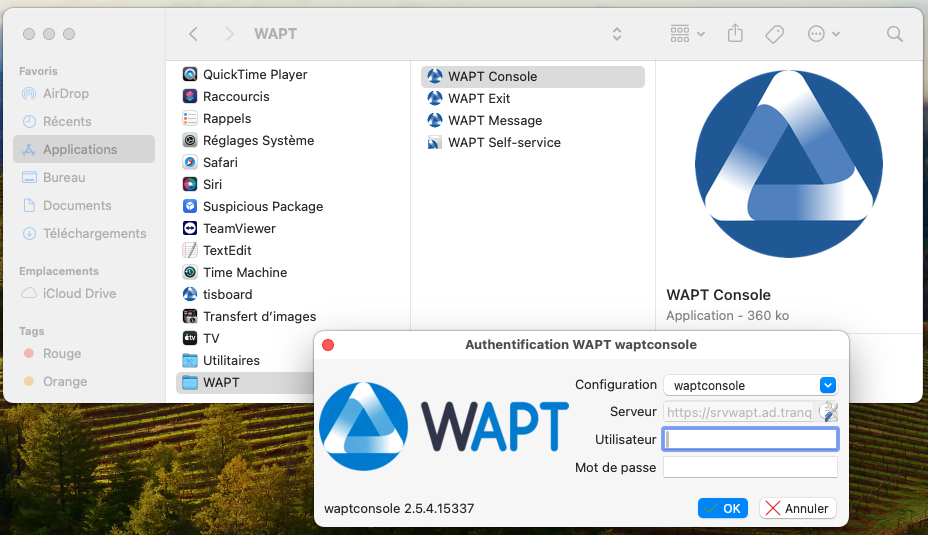
The WAPT Console startup on macOS
Attention
Even if you are not using WAPT Agent for Windows, it is currently necessary to install tis-waptsetup-windows package on the server.
1.1.1. The WAPT management Console
1.1.1.1. Configuring the WAPT Console connection
If it’s the first time your start WAPT Console, the Configuration window open it automaticaly.
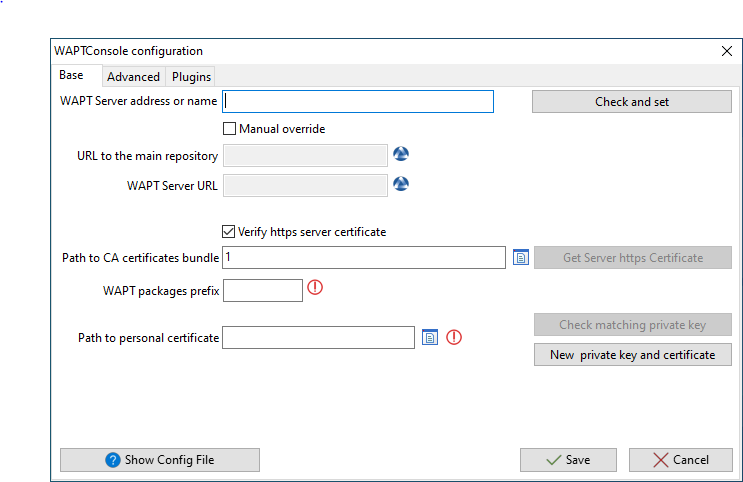
The WAPT Console configuration window
Set the WAPTServer adress, then click on Check and Set. You must have an error.

The WAPT Console configuration TLS error.
Click on Get Server https Certificate. You must have a green check for URL to the main repository and WAPT Server URL. Also check the WAPT Server SSL certificate is correct before continue.

The WAPT Server SSL Certificate
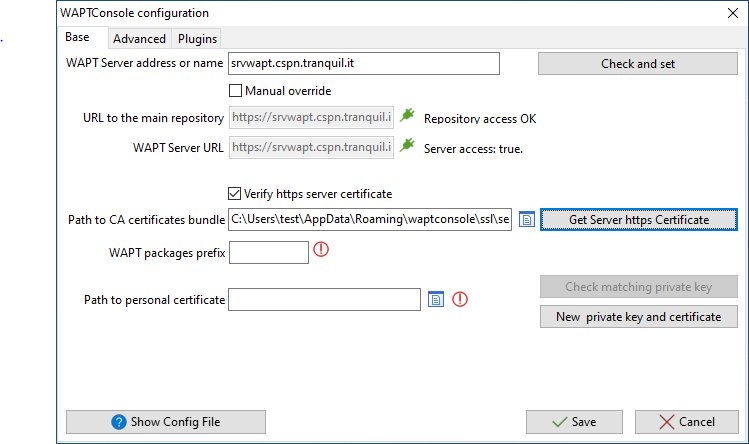
The WAPT Console configuration SSL OK
Then if all is OK, click on Save. Log into the WAPT Console with the SuperAdmin login and password.
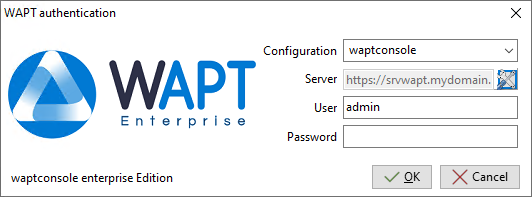
The WAPT Console authentication window
If you have any issue logging into the WAPT Console, please refer to the FAQ: Error message when opening the WAPT Console.
It is recommended to launch the WAPT Console with a Local Administrator account to enable local debugging of WAPT packages.
For Enterprise version, it is possible to authenticate with Active Directory.
1.1.1.2. Configuring the WAPT Console preference
If you want to configure some preferences you can go to View → Display preferences

Display preference in the waptconsole
Options |
Description |
|---|---|
Maximum number of hosts to display |
Define the maximum number of hosts to display |
Reset console layout |
Reset default preferences |
Reset “don’t ask me again” |
Reset the box “don’t ask me again” |
Language |
Define the language in the WAPT-Console (English or French) |
Theme |
Define the theme (auto, light, or dark) |
Options |
Description |
|---|---|
Enable advanced display an grid features |
Allows you to manage filters by column |
Enable external tools in hosts popus menuselection |
Allows external software action to be used in the host menu selection |
Enable management features |
Allows you to create and delete sql queries in the reporting tab |
Hide unavailable Applications |
Hides certain actions when the ACL is not active on the account |
Enable WAPTWUA features |
Enable/Disable the waptwua tab and its use |
Show hosts audit data tab |
displays the audit data tab on machines |
Show Developers features |
displays the package development tab and lets you edit packages in the wapt console |
Options |
Description |
|---|---|
Show inventory |
Displays the inventory tab |
Show Private Repository |
Displays the private repository tab |
Show Reporting |
Displays the reporting tab |
Show Secondary Repository |
Displays the secondary repository tab |
Show Software inventory |
Displays the software inventory tab |
Show OS deploy |
Displays the OS deploy tab |
Show Wapt Package development |
Displays the Wapt Package development tab |
1.2. Activating a WAPT licence
With WAPT, Discovery and Enterprise versions have different licences.
To activate the licence, use the licence.lic file provided by our sales department.
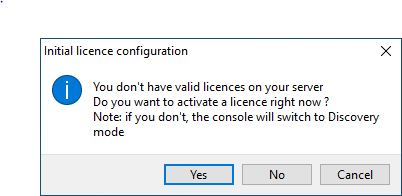
If you are launching the WAPT Console for the first time, a wizard will ask you if you have a WAPT Enterprise licence.
Or in the WAPT Console, click on the ? tab.

Then choose Licences.
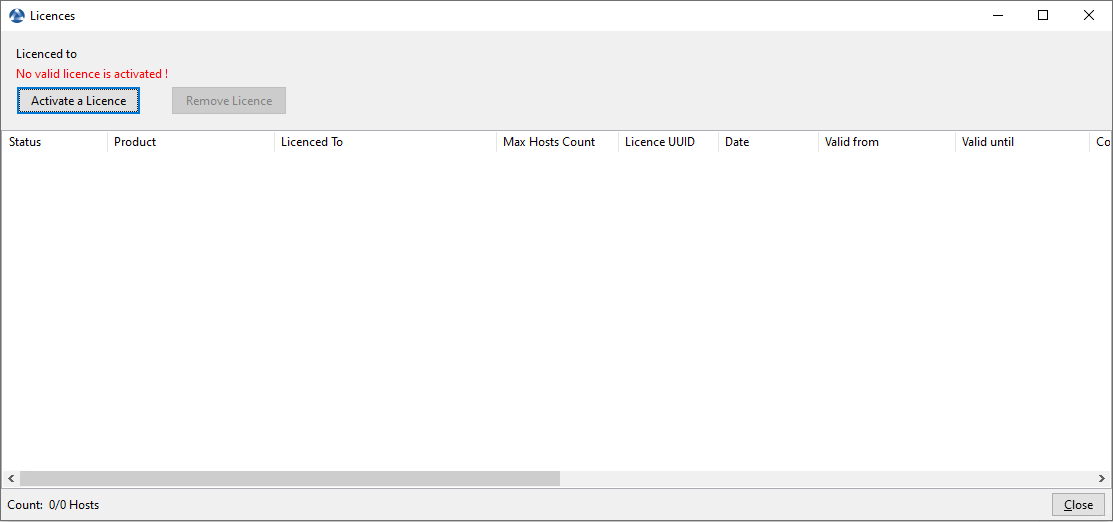
Window listing no activated WAPT licence in the WAPT Console
Finally, select your
licence.licand click Open.
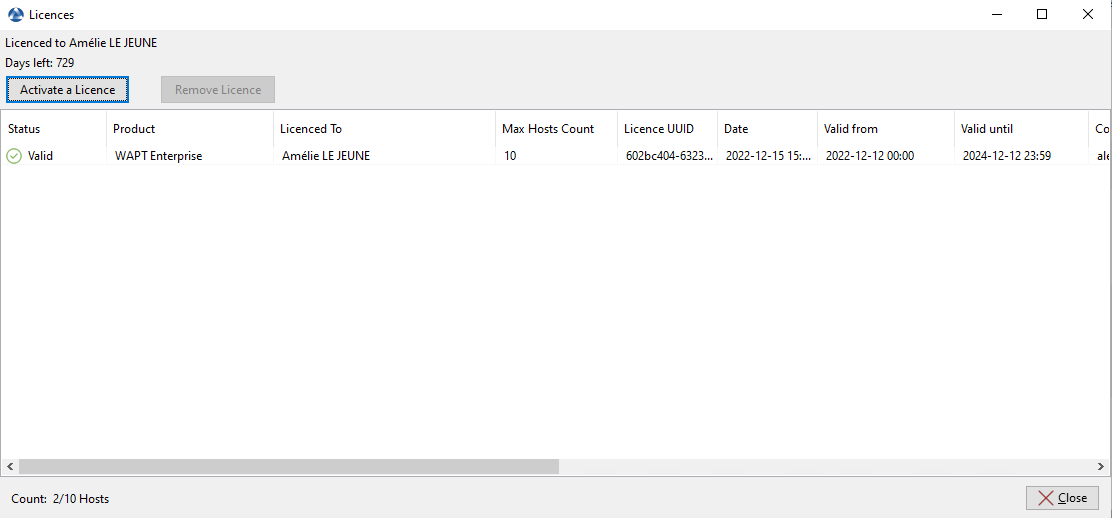
Window showing an activated licence in the WAPT Console
Note
If you encounter any difficulties installing the license, please refer to this page. It lists common errors and their solutions throughout the document.
1.3. Certificate affectation
A message may appear indicating that no personal certificate is defined in the WAPT Console.
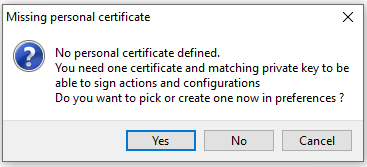
WAPT personal certificate not found in the WAPT Console
Select Yes.
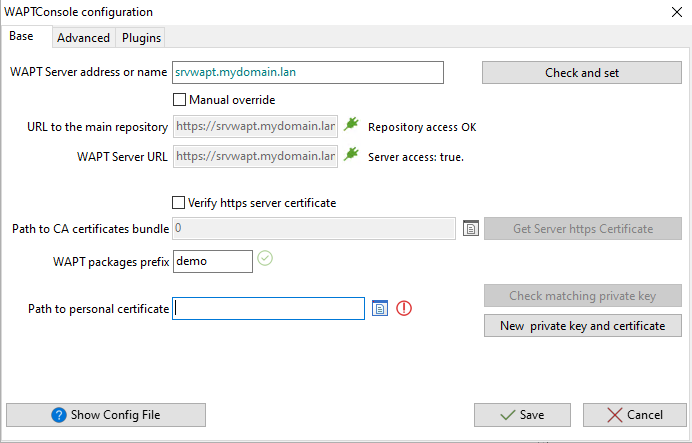
Window for the basic configuration of the WAPT Console
Attention
A common user error is to be tempted to create a new certificate at this step when one already exists.
If you have previously defined and deployed a certificate on your fleet of computers, then you MUST select the currently defined certificate. You MUST NOT create a new certificate.
If this is your first time using WAPT, click on New private key and certicate and see create your certificate.
1.4. Generating the Administrator’s certificate for signing WAPT packages
In the example, the name of the private key is
wapt-private.pem.In the example, the name of the public certificate signed with the private key is
wapt-private.crt.
1.4.1. Private key wapt-private.pem
Danger
The wapt-private.pem file is fundamental for security.
It MUST be stored in a safe place and correctly protected.
The wapt-private.pem file MUST NOT be stored on the WAPT Server.
The wapt-private.pem file is the private key, it is located by default in the C:\private folder of the Administrator workstation and is password protected.
This private key will be used along with the certificate to sign packages before uploading them onto the WAPT repository.
1.4.2. Public certificate wapt-private.crt
The wapt-private.crt file is the public certificate that is used along with the private key.
It is by default created in the C:\private folder of the Administrator, copied and deployed in C:\Program Files (x86)\wapt\ssl on Windows desktops or in /opt/wapt/ssl on Linux and macOS devices.
This certificate is used to validate the signature of WAPT packages before they are installed.
Attention
If the public certificate used on the WAPT Console is not derived from the private key used for generating the WAPT Agents, the WAPT Console will not see the WAPT Agents and you will not be able to perform any action on any WAPT Agent.
Child certificates of private keys are also functional.
1.4.3. Generating a certificate to use with WAPT
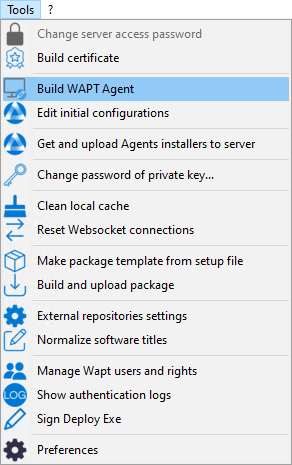
In the WAPT Console go to .
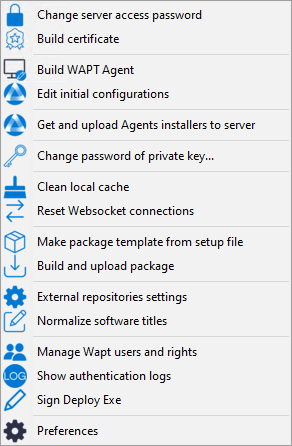
Building a self-signed certificate
With WAPT Enterprise, you can create a Master key with a Certificate Authority flag that can both sign WAPT packages and sign new certificates to be used with WAPT.
In order to create new signed certificates for delegated users, please refer to creating a new certificate.
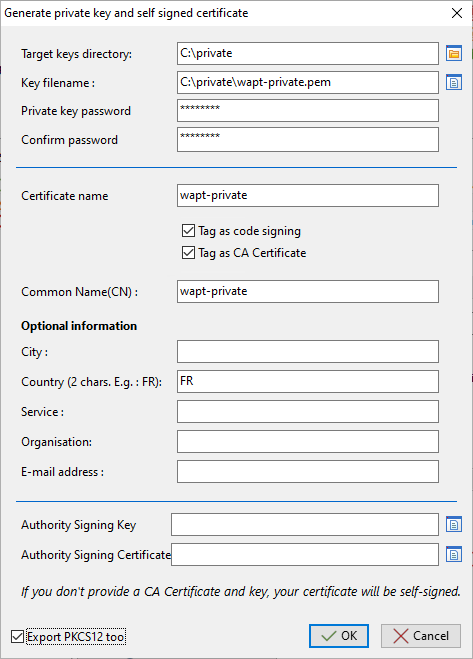
Creating a self-signed certificate for the WAPT Enterprise version
Certificate informations
Value |
Description |
Required |
Enterprise |
|---|---|---|---|
Target key directory |
Defines the folder where the private key and the public certificate will be stored. |
|
|
Key filename |
Defines the name of the .pem private key. |
|
|
Private key password |
Defines the password for unlocking the key. |
|
|
Confirm password |
Confirms the password for unlocking the key. |
|
|
Certificate name |
Defines the name of the .crt certificate. |
|
|
Tag as code signing |
Defines whether the certificate/ key pair will be allowed to sign software packages. |
|
|
Tag as CA certificate |
Defines whether the certificate can be used to sign other certificates (main or intermediate Certificate Authority). |
|
|
Common Name (CN) |
Defines the Common Name to register in the certificate. |
|
|
City |
Defines the name of the certificate holder’s city to register in the certificate. |
|
|
Country (2 chars. E.g: FR) |
Defines the name of the certificate holder’s country (FR, EN, ES, DE …) to register in the certificate. |
|
|
Service |
Defines the name of certificate holder’s service or organizational department to register in the certificate. |
|
|
Organization |
Defines the name of the certificate holder’s Organization to register in the certificate. |
|
|
E-mail address |
Defines the email address of the certificate holder to register in the certificate. |
|
|
Authority Signing Key |
Defines the key (.pem) of the CA. |
|
|
Authority Signing Certificate |
Defines the certicate (.crt) of the CA. |
|
|
Export PKCS12 |
Forces the creation of the |
|
Additional details are stored in the private key. This information will help with identifying the origin of the certificate and the origin of the WAPT package.
The password complexity MUST comply with your Organization’s security requirements (visit the ANSSI website for recommendations on passwords).
Danger
The
wapt-private.pemfile MUST NOT be stored on the WAPT Server.
Click on OK to go on to the next step.
If everything has gone well the following message will appear.

Dialog box informing the certificate has been generated successfully
Click on OK.
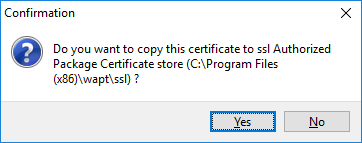
Dialog box requesting confirmation of the copy of the certificate in the ssl folder in the WAPT Console
Click on Yes to copy the newly generated certificate in the folder
C:\Program Files (x86)\wapt\sslon Windows or/opt/wapt/sslon Linux or macOS. This certificate will be picked up during the compilation of the WAPT Agent and deployed on the client computers.
You may go on to the next step and Building the WAPT Agent installer.
1.5. Packet prefix definition
A message may appear indicating that no package prefix has been defined.
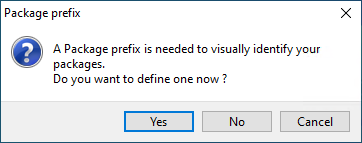
Dialog box informing that no prefix has been set in the WAPT configuration
Select Yes
Set your packages prefix on WAPT packages prefix
Window for the basic configuration of the WAPT Console
Warning
The prefix is case sensitive, we recommand to use lower case.
1.6. WAPT Agent check
A message may appear indicating that your WAPT Agent version is obsolete or not yet present.
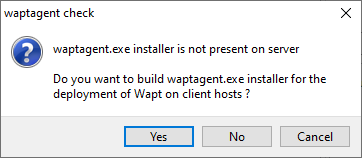
Dialog box informing that the WAPT Agent is not present on the WAPT Server
If the administrator’s certicate has not yet been generated, it is possible to generate a new WAPT Agent by clicking on Yes.
Also click on No and generate the administrator’s certicate.
1.6.1. Building the WAPT Agent installer
The waptagent binary is an InnoSetup installer.
Once the WAPT Console has been installed on the Administrator computer, we have all files required to build the WAPT Agent installer.
Before building the WAPT Agent, please verify that your certificates are ready. If you wish to deploy other public certificates on your Organization’s computers that are equipped with WAPT, you will have to copy them in a common folder then select it when generating the WAPT agent.
The former method for building the WAPT agent did not prevent copying the private key of any Administrator in C:\Program Files (x86)\wapt.
It means that, by error, a private key could be deployed on every computer, becoming a serious security breach.
Before 2.3.0 version, this folder was used when building the WAPT Agent and the private keys would then be deployed on all the computers.
Now, the new method is far more secure.
It uses a waptsetup that is signed by Tranquil IT, the configuration being written into a json file that is attached to the signed waptsetup file. Alternatively, we can also create a WAPT configuration package that will be called when deploying the WAPT Agent. This method is called certificate stuffing.
On top of avoiding errors, like deploying a private certificate by error, the method has the advantage of no longer requiring to custom build a WAPT Agent.
This method finally avoids Antivirus incorrectly flagging the waptsetup file as a false positive.
When the WAPT Agent will be silently installed, it will take the default configuration: it will build the WAPT Agent’s wapt-get.ini configuration file and extract certificates into wapt/ssl.
To secure this installation (for example with GPOs), waptsetup.exe and its integrated json configuration have the name and hash of the configuration name on the WAPT Server. When the installer will apply the json configuration, it checks beforehand with this hash that the json data has not been altered.
In the WAPT Console, go to .
Generating the WAPT Agent from the WAPT Console
Before building the WAPT Agent, you need to choose how it will identify itself with the WAPT Server.
1.6.2. Choosing the mode to uniquely identify the WAPT Agents
In WAPT you can choose the unique identification mode of the WAPT Agents.
When a WAPT Agent registers the WAPT Server MUST know if it is a new host or if it is a host that has already been registered.
For this, the WAPT Server looks at the UUID in the inventory.
WAPT offers 3 modes to help you distinguish between hosts, it is up to you to choose the mode that best suits you.
Attention
After choosing a mode of operation, it is difficult to change it, think carefully!
This mode of operation makes it possible to identify the hosts in the WAPT Console in a physical manner.
If you replace a computer and give the new computer the same name as the previous one, you will have two computers that will appear in the WAPT Console since you will have physically two different computers.
Note
Some vendors do inadequate work and assign the same BIOS UUIDs to entire batches of computers. In this case, WAPT will only see one computer!!!
This mode of operation is similar to that in Active Directory. The hosts are identified by their FQDN.
Note
This mode does not work if several hosts in your fleet share the same name.
We all know this should never happen.
This mode of operation allows PCs to be identified by their WAPT installation. Each installation of WAPT generates a unique random number. If you uninstall the WAPT Agent and then reinstall the WAPT Agent on the host, you will see a new device appear in the WAPT Console.
Note
In this mode, the UUIDs have the prefix RMD.
1.6.3. Build
In the WAPT Console, go to .
Generating the WAPT Agent from the WAPT Console
Check in the informations that are necessary for the installer.
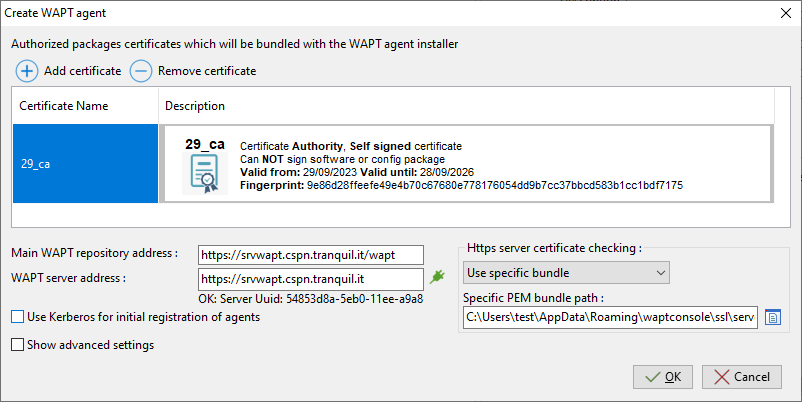
Filling in the informations on your Organization
Value |
Description |
Required |
Enterprise |
|---|---|---|---|
Authorized packages certificates |
Defines all trusted certificates buildled with WAPT Agent installer and set in default configuration. |
|
|
Main WAPT repository address |
Defines the URL of the main WAPT repository. |
|
|
WAPT Server address |
Defines the URL of the WAPT Server. |
|
|
Https server certificate checking |
Defines whether the HTTPS certificate client authentication is activated on the WAPT Server. |
|
|
Use Kerberos for initial registration |
Defines whether Kerberos authentication of the WAPT Agents is to be used with the WAPT Server. |
|
Danger
The checkbox Use kerberos for the initial registration may be checked ONLY IF you have followed the documentation on Configuring the kerberos authentication.
If you click on Show advenced settings, you can configure more parameters for WAPT Agent.
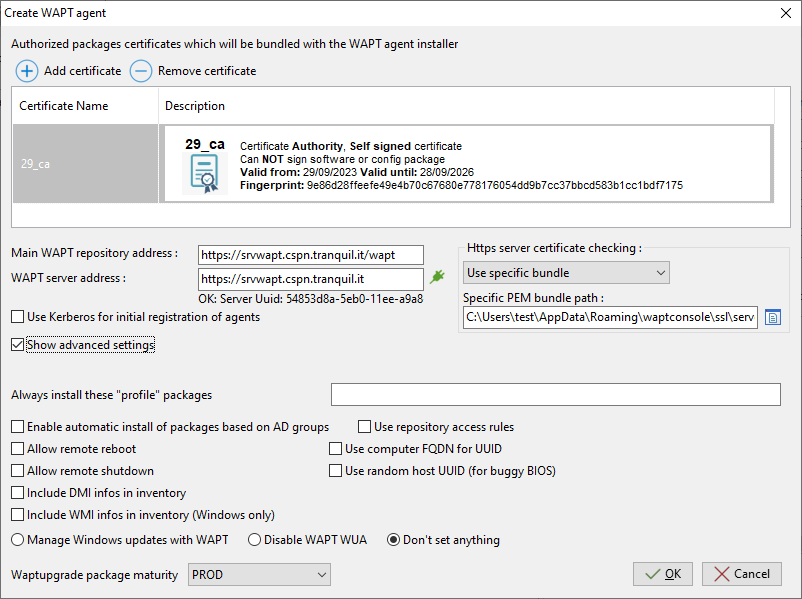
Setting more parameters for WAPT Agent configuration
Value |
Description |
Required |
Enterprise |
|---|---|---|---|
Always install these “profile” packages |
Defines whether to automatically install group packages upon WAPT Agent installation. |
|
|
Enable automatic install of packages based on AD Groups |
Enables the installation of profile packages. This feature can degrade the performance of WAPT. |
|
|
Allow remote reboot |
Defines whether to allow remote reboots from the WAPT Console. |
|
|
Allow remote shutdown |
Defines whether to allow remote shutdowns from the WAPT Console. |
|
|
Include DMI infos in inventory |
Get DMI infos in agent inventory |
|
|
Include WMI infos in inventory (Windows only) |
Get WMI infos in agent inventory |
|
|
Use repository access rules |
Defines whether repository access rules are to be used for replicating remote repositories. |
|
|
Use computer FQDN for UUID |
Defines whether FQDNs are to be used for identifying WAPT Agents. |
|
|
Use random host UUID (for buggy BIOS) |
Defines whether random UUIDs are to be used for identifying WAPT Agents. |
|
|
Manage Windows updates with WAPT | Disable WAPT WUA | Don’t set anything |
Enables or disables WAPT WUA. |
|
|
Waptupgrade package maturity |
Allows to choose the maturity of the waptupgrade package. |
|
|
For more information to Windows update section, refer to this article on configuring WAPTWUA on the WAPT Agent.
Provide the password for unlocking the private key.
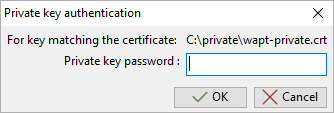
Providing the password for unlocking the private key

Progression of WAPT Agent installer building
Once the WAPT Agent installer has finished building, a dialog pops up asking you if you want to configure the local WAPT Agent. Click on Yes.
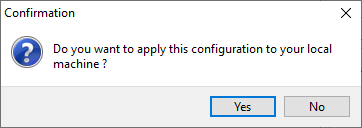
Configure local WAPT Agent
1.7. Initial Configuration 
It is possible to configure the WAPT Agent for standard and advanced options via a GUI. Very similar to creating a configuration package, we strongly recommand you to see the section beforehand. The initial configuration aims to configure important parameters in the WAPT Agent, whether it be Windows, Linux or macOS. The method is very useful for installing a WAPT Agent on Linux or macOS.
In the WAPT Console, go to .
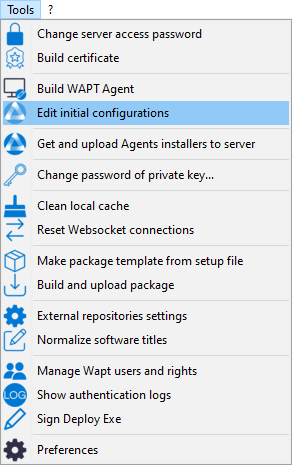
Creating the initial configuration
After generating WAPT Agent for Windows, an inital configuration has been created automaticaly and named default.
Fill in the informations that are necessary for the configuration.
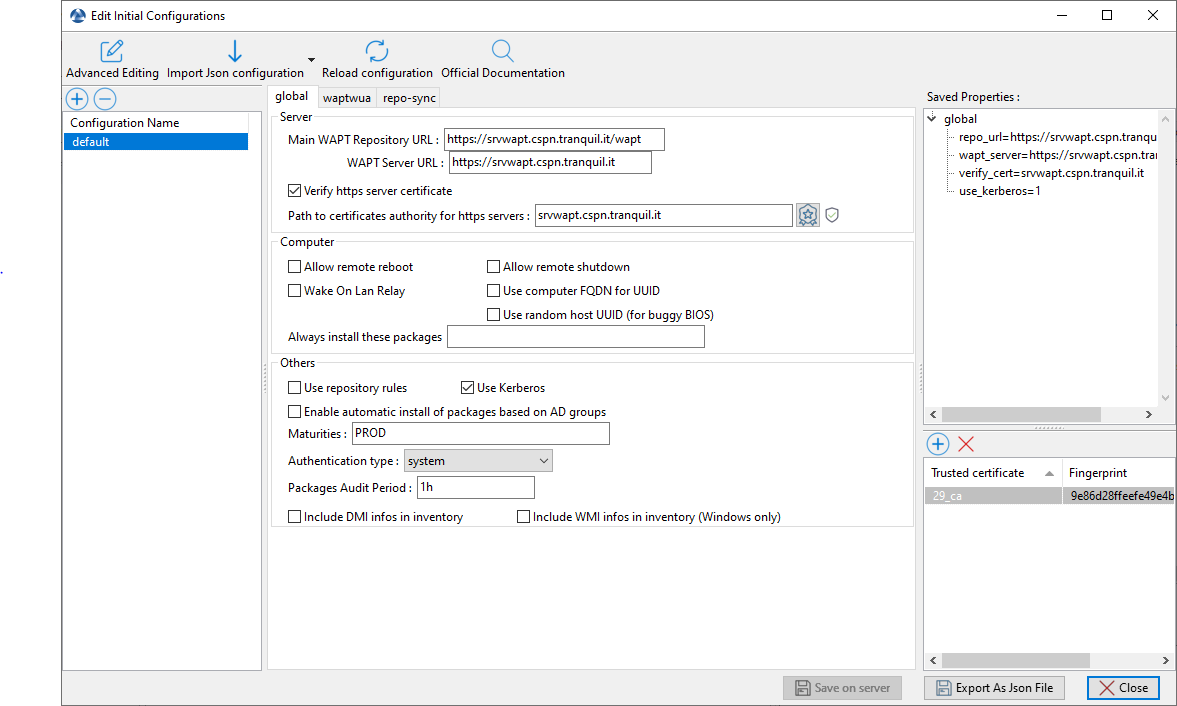
Editing the initial configuration
Value |
Description |
|---|---|
Advanced Editing |
Displays the WAPT Agent configuration options as in |
Add certificate |
Adds certificate with the configuration. |
Load Json |
Loads a previously created configuration. |
Refresh Server Configuration |
Refreshes the list of available configurations. |
+ |
Creates a new configuration. |
- |
Deletes a configuration. |
Value |
Description |
Required |
Enterprise |
|---|---|---|---|
Main WAPT Repository URL |
Defines the URL of the main WAPT repository. |
|
|
WAPT Server URL |
Defines the URL of the WAPT Server. |
|
|
Verify https server certificate |
Defines whether the HTTPS certificate client authentication is activated on the WAPT Server. |
|
|
Path to certificate authority for https servers |
Defines the path to the certificates used for HTTPS verification. |
|
|
Allow remote reboot |
Defines whether to allow remote reboots from the WAPT Console. |
|
|
Allow remote shutdown |
Defines whether to allow remote shutdowns from the WAPT Console. |
|
|
Wake On Lan Relay |
Activates the WoL functionality on secondary repositories. |
|
|
Use computer FQDN for UUID |
Defines whether FQDNs are to be used for identifying WAPT Agents. |
|
|
Always install these packages |
Defines whether to automatically install group packages upon WAPT Agent installation. |
|
|
Use repository rules |
Enable or disable the repository rules for the waptagent repository documentation. |
|
|
Use Kerberos |
Defines whether Kerberos authentication of the WAPT Agents is to be used with the WAPT Server. |
|
|
Enable automatic install of packages based on AD Groups |
Enables the installation of profile packages. This feature can degrade the performance of WAPT. |
|
|
Maturities |
List of package maturities than can be viewed and installed by WAPT Agent. Default value is |
|
|
Authentification type |
Sets how the self service authentication works. Possible values are: system, waptserver-ldap, waptagent-ldap or filetoken. |
|
|
Packages Audit Period |
Defines the frequency at which audits are triggered. |
|
Value |
Description |
Required |
|---|---|---|
Manage Windows updates with WAPT |
Enables or disables WAPT WUA. |
|
Allow all updates by default unless explicitely forbidden by rules |
Defines whether to allow all Windows Updates if not forbidden by WUA rule packages. |
|
Allowed Severities |
Defines a severity list that will be automatically accepted during a WAPT windows update scan. ex: Important, Critical, Moderate. |
|
Download updates from Microsoft Servers |
Defines whether updates are downloaded directly from Microsoft servers. |
|
Scan / download scheduling |
Defines the Windows Update scan recurrence (Will not do anything if waptwua package rule or |
|
Install pending Windows updates at shutdown |
Forces updates to install when the host shuts down. |
|
Installation scheduling |
Defines the Windows Update install recurrence (will do nothing if no update is pending). |
|
Minimum delay before installation (days after publish date) |
Sets a deferred installation delay before publication. |
|
Danger
These options should only be used on a secondary repository.
Value |
Description |
Required |
|---|---|---|
Use remote repo |
Enables the WAPT Server to serve as a repository. |
|
Remote repository directories |
Defines folders to synchronize. |
|
Synchronize only when asked |
Enable or disable automatic synchronization |
|
Synchronize task period |
Sets synchronization periodicity. |
|
Local repository time for synchronization start |
Sets synchronization start time (HH:MM / 24h format). |
|
Local repository time for synchronization end |
Sets synchronization start stop (HH:MM / 24h format). |
|
Value |
Description |
|---|---|
Saved Properties |
List of options with the configuration. |
Certificate |
List of certificate with the configuration. |
Value |
Description |
|---|---|
Save on server |
Saves the configuration on the WAPT server. |
Export As Json File |
Exports the configuration in JSON. |
Close |
Closes the window. |
After configuration it is possible to copy commands by right-clicking on the configuration.
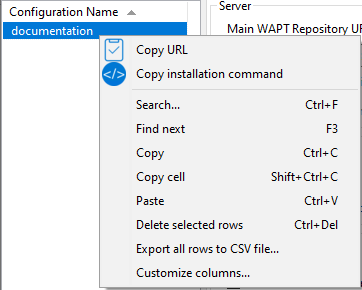
Copy command
Value |
Description |
|---|---|
Copy URL |
Gives a download URL to retrieve the .json from the WAPT server. |
Copy installation command |
Gives a command to install the configuration for a WAPT Agent. |
Note
It is possible to install a blank WAPT Agent and to give it the copied installation command to provide the configuration.