3. Upgrade WAPT Server
If your WAPT Server is a virtual host, take a snapshot of the VM. This way, you will be able to go back easily in the rare case that the update fails.
Warning
After each WAPT Server update, update your WAPT Console, then regenerate the WAPT Agent.
Before upgrading WAPT Server, please refer to the following upgrading compatibility chart:
To WAPT 2.6 |
|
|---|---|
From WAPT 2.4 |
|
From WAPT 2.5 |
|
Danger
If you migrating the WAPT server from Debian 12 to Debian 13: Follow this procedure for updating the PostgreSQL database
3.1. Switching of WAPT Edition (Community, Discovery, Enterprise)
WAPT Community is no longer supported. If you want to upgrade from WAPT 1.8.2 Community you can upgrade to WAPT Discovery or WAPT Enterprise. Please note that WAPT Discovery is limited to 300 clients.
It is always possible to upgrade from a WAPT Community setup to WAPT Discovery or Enterprise.
The WAPT Server will make the appropriate changes.
To upgrade WAPT Discovery to WAPT Enterprise simply upload a valid licence to the WAPT Server from the WAPT Console.
If your Enteprise licence expire, it will fall back on the Discovery Edition. If you are running WAPT Discovery and you have more that 300 client computers in your inventory, the WAPT Console will stop working and will only give you the option to delete computer entries from the inventory. The WAPT Console will return to working condition when the inventory returns below the 300 computer limit.
3.2. Upgrading from version 2.6 to latest 2.6
To do a minor upgrade please follow the procedure corresponding to your server operating system.
Warning
Tranquil IT EV Code Signing certificate has been renewed after the last one expired on March the 7th. All new Tranquil IT assets are signed with the new certificate.
AFTER upgrading the WaptServer FROM Wapt version 2.6.1.17765 and below, if the WaptConsole has NOT YET been upgraded, you will have a warning popup like the one below when starting WaptConsole.
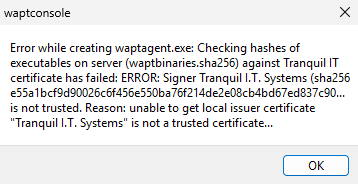
This is due to the fact that the older waptconsole trie to check the signature of server binaries using the old certificate and refuse to download because it does match.
Thus the wapt admin have to download the new waptsetup.exe binary directly from the WaptServer https://srvwapt.mydomain.lan/wapt/waptsetup.exe and install it on management machine.
Update the package repository and import the GPG key from the repository.
bash -c 'wget -qO- https://wapt.tranquil.it/$(lsb_release -is)/tiswapt-pub-2026.gpg > /usr/share/keyrings/tiswapt-pub.gpg'
echo "deb [signed-by=/usr/share/keyrings/tiswapt-pub.gpg] https://wapt.tranquil.it/$(lsb_release -is)/wapt-2.6/ $(lsb_release -cs) main" | sudo tee /etc/apt/sources.list.d/wapt.list > /dev/null
Update of the GPG Key for WAPT Debian Repositories: Transition to tiswapt-pub-2026.gpg
Note
The GPG key of the Debian repository has been updated in accordance with Debian policies for wapt-2.6.1.17654 and above. This Wapt Debian repositories have been updated accordingly and are signed with a new key is named tiswapt-pub-2026.gpg. The previous key is named tiswapt-pub.gpg. To check the key you are currently using you can use the gpg binary. This is the output for the new key :
gpg --show-keys /usr/share/keyrings/tiswapt-pub.gpg
pub   rsa4096 2023-02-22 [SC]
      4282FBE84E0F7E923E8F54909C10034123C0FCD5
uid                      Tranquil IT Systems <technique@tranquil.it>
sub   rsa4096 2023-02-22 [E]
This is the output with the old key
root@trixie:~# gpg --show-keys tiswapt-pub.gpg
pub   rsa4096 2017-09-07 [SC]
      8F41DAF53DBC098A9AB916000022908B0C0E47AD
uid                      Tranquil IT Systems <contact@tranquil.it>
sub   rsa4096 2017-09-07 [E]
sub   rsa4096 2017-09-07 [S] [expired: 2019-09-07]
Update the repository and install the packages.
Update the underlying distribution and upgrade WAPT Server.
export DEBIAN_FRONTEND=noninteractive
apt update && apt upgrade -y
apt install tis-waptserver tis-waptsetup -y
unset DEBIAN_FRONTEND
Launch the post-configuration step post-configuration step
Once completed, your WAPT Server is ready.
Update the underlying distribution and upgrade WAPT Server.
dnf update -y
dnf install tis-waptserver tis-waptsetup -y
Launch the post-configuration step post-configuration step
Once completed, your WAPT Server is ready.
Download and execute waptserversetup.exe.
Warning
The installation of the WAPT Server MUST be done using a Local Administrator account on the host
Choose the language for the WAPT installer.
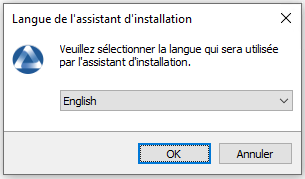
Click on OK to go on to the next step.
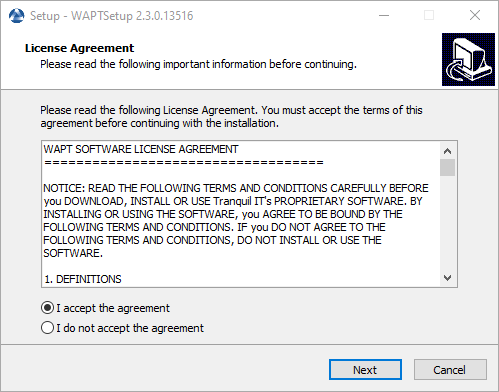
Accept the licence terms and click on Next to go to next step.
Choose additional configuration tasks (leave the default if not sure).
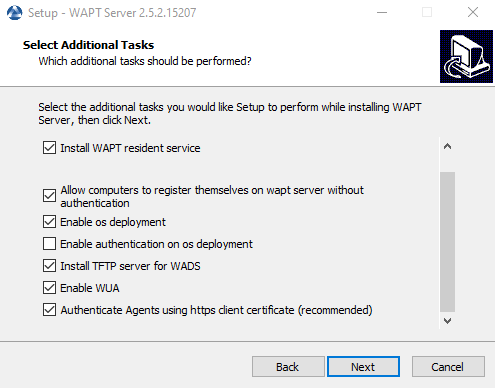
Choosing the installer options for deploying the WAPT Server
Do not change the password for the WAPT Server (if not necessary).
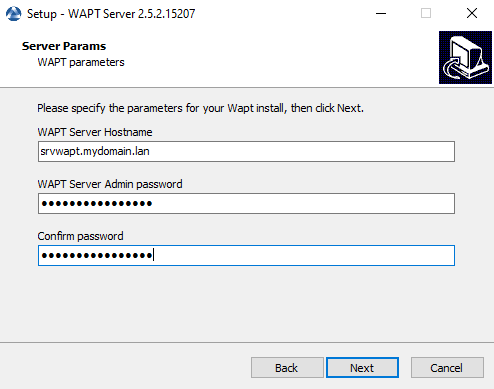
Click on the Install to launch the installation, wait for the installation to complete.
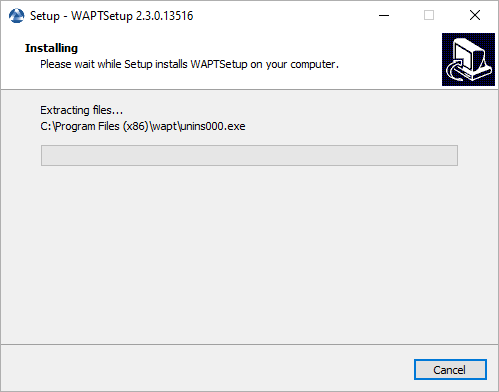
Click on Finish to close the window.
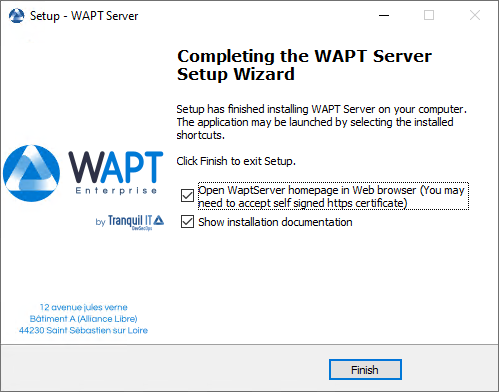
Once completed, your WAPT Server is ready.
Warning
After each server update, update your console then regenerate the WAPT Agent and the GPO (if used).
Rebuild a WAPT Windows Agent.
Rebuild a WAPT Linux or MacOS Agent.
Update the GPO
3.3. Upgrading from version 2.4 or 2.5 to 2.6
Requirements to check before updating
Note
Before upgrading, ensure that installation requirements are met.
If you are using WAPT WADS, please note that older WADS WinPE and WAPT 2.6 WADS WinPE are not compatible.
You need to recreate the WinPE File using the upload WinPE button in the OS Deployment tab.
If you use WAPT Deploy in a GPO, then you need to update your GPO with the lastest waptdeploy.exe binary.
Warning
For WAPT server, during the postconf be carefull.
It is essential to enter the FQDN name of your server and not its IP address. For Example :
FQDN for the WAPT Server (eg. wapt.example.com)

---------------------------------------------
wapt.mydomain.lan
---------------------------------------------

            < OK >          < Cancel >
First of all, update the underlying distribution and install the WAPT Server packages.
apt update && apt upgrade -y
apt install apt-transport-https lsb-release gnupg
Then update the package repository and import the GPG key from the repository.
sudo bash -c 'wget -qO- https://wapt.tranquil.it/$(lsb_release -is)/tiswapt-pub-2026.gpg > /usr/share/keyrings/tiswapt-pub.gpg'
echo "deb [signed-by=/usr/share/keyrings/tiswapt-pub.gpg] https://wapt.tranquil.it/$(lsb_release -is)/wapt-2.6/ $(lsb_release -c -s) main" > /etc/apt/sources.list.d/wapt.list
Warning
breaking change: For WAPT versions earlier than 2.6.1.17654, please use this gpg key.
wget -qO- https://wapt.tranquil.it/$(lsb_release -is)/tiswapt-pub.gpg > /usr/share/keyrings/tiswapt-pub.gpg
Update the repository and install the packages.
export DEBIAN_FRONTEND=noninteractive
apt update
apt install tis-waptserver tis-waptsetup -y
unset DEBIAN_FRONTEND
Launch the post-configuration step post-configuration step.
At last, launch the following script testing-ldap-connectivity.sh (/opt/wapt/waptserver/scripts/testing-ldap-connectivity.sh). Identifying an AD account and an associated group. if the feedback is "ALL GOOD" then the upgrade has been successfully completed and you can launch the wapt console.
You encountered an error with the testing-ldap-connectivity.sh script. Please check the following:
Warning
With version 2.6 of WAPT, Self-Service does NOT need simple bind LDAP authentication anymore. Kerberos (recommended) or LDAP SASL bind over GSSAPI (2nd choice) should be used:
In
/etc/krb5.conf, the file should look like this.
[libdefaults]
  default_realm = MYDOMAIN.LAN
  dns_lookup_kdc = true
  dns_lookup_realm = true
If you want to disable DNS lookup for KDCs, you need to modify the file as follows.
[libdefaults]
  default_realm = MYDOMAIN.LAN
  dns_lookup_kdc = false
  dns_lookup_realm=false
[realms]
  MYDOMAIN.LAN = {
  kdc = 192.168.1.13
  kdc = 192.168.1.12
  }
Note
If you use the parameter wapt_admin_group_dn in your waptserver.ini, you need to modify wapt_admin_group_dn to wapt_admin_group and write only the common name of your group.
For example:
wapt_admin_group_dn = CN=WAPTADMIN,OU=USERS,DC=MYDOMAIN,DC=FR
wapt_admin_group = WAPTADMIN
The setting ad_domain_name in the
waptserver.ini, should contain the name of your domain and not an IP address or a server name.
This parameter replaces all the old parameters starting with ldap.
ad_domain_name = mydomain.lan
Note
This procedure is for a Redhat 10 and derivatives, if you use another version of Redhat follow this procedure to update.
First of all, update the underlying distribution and necessary packages.
dnf update -y
dnf install epel-release redhat-lsb-core -y
Then update the package repository and import the GPG key from the repository.
Add Tranquil IT’s repository.
cat > /etc/yum.repos.d/wapt.repo <<EOF
[wapt]
name=WAPT Server Repo
baseurl=https://wapt.tranquil.it/redhat10/wapt-2.6/
enabled=1
gpgcheck=1
EOF
Retrieve the
.gpgkey.
wget -q -O /tmp/tranquil_it.gpg "https://wapt.tranquil.it/redhat10/RPM-GPG-KEY-TISWAPT-10"; rpm --import /tmp/tranquil_it.gpg
Warning
breaking change: For WAPT versions earlier than 2.6.1.16446, with redhat 8 please use this gpg key.
wget -q -O /tmp/tranquil_it.gpg "https://wapt.tranquil.it/redhat8/RPM-GPG-KEY-TISWAPT-8-old"; rpm --import /tmp/tranquil_it.gpg
And finally upgrade the WAPT Server.
dnf install tis-waptserver tis-waptsetup cabextract -y
Launch the post-configuration step post-configuration step.
At last, launch the following script testing-ldap-connectivity.sh (/opt/wapt/waptserver/scripts/testing-ldap-connectivity.sh). Identifying an AD account and an associated group. if the feedback is "ALL GOOD" then the upgrade has been successfully completed and you can launch the wapt console.
You encountered an error with the testing-ldap-connectivity.sh script. Please check the following:
Warning
With version 2.6 of WAPT, Self-Service does NOT need simple bind LDAP authentication anymore. Kerberos (recommended) or LDAP SASL bind over GSSAPI (2nd choice) should be used:
In
/etc/krb5.conf, the file should look like this.
[libdefaults]
  default_realm = MYDOMAIN.LAN
  dns_lookup_kdc = true
  dns_lookup_realm = true
If you want to disable DNS lookup for KDCs, you need to modify the file as follows.
[libdefaults]
  default_realm = MYDOMAIN.LAN
  dns_lookup_kdc = false
  dns_lookup_realm=false
[realms]
  MYDOMAIN.LAN = {
  kdc = 192.168.1.13
  kdc = 192.168.1.12
  }
Note
If you use the parameter wapt_admin_group_dn in your waptserver.ini, you need to modify wapt_admin_group_dn to wapt_admin_group and write only the common name of your group.
For example:
wapt_admin_group_dn = CN=WAPTADMIN,OU=USERS,DC=MYDOMAIN,DC=FR
wapt_admin_group = WAPTADMIN
The setting ad_domain_name in the
waptserver.ini, should contain the name of your domain and not an IP address or a server name.
This parameter replaces all the old parameters starting with ldap.
ad_domain_name = mydomain.lan
Download and execute waptserversetup.exe.
Choose the language for the WAPT installer.
Click on OK to go on to the next step.
Accept the licence terms and click on Next to go to next step.
If an old installation installation folder found, this message appear. Click on Yes to go on to the next step.
Select additional task if needed.
Choosing the installer options for deploying the WAPT Server
Change the WAPT Server password if needed, then press Next.
Click on the Install to launch the installation, wait for the installation to complete.
Click on Finish to close the window.
Warning
DO NOT use the WAPT Console on the WAPT Server. DO NOT install nor run your WAPT package development tools on the WAPT Server.
The WAPT Server on your Windows server or workstation is ready.
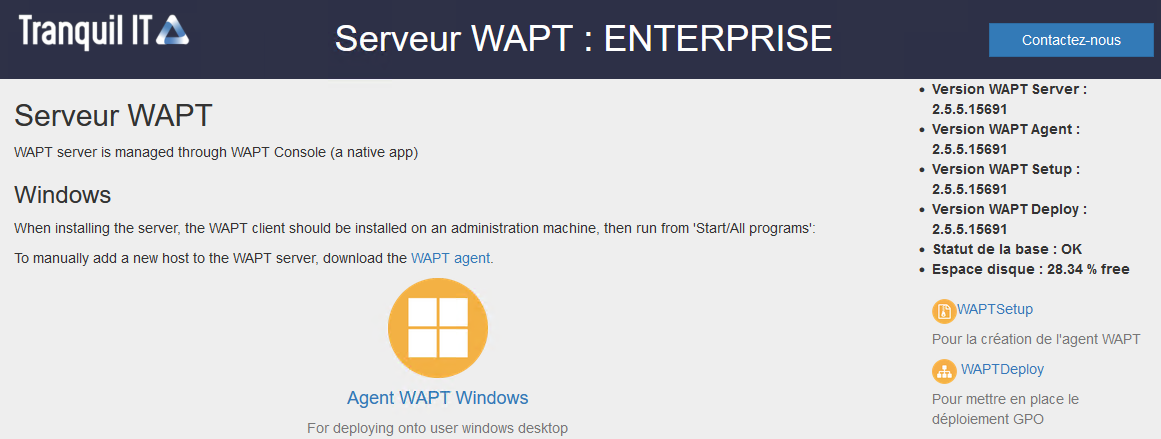
The WAPT Server interface in a web browser
Your WAPT Server is now ready. You may now go to the documentation on Installing the WAPT management Console.
Warning
After each server update, update your console then regenerate the WAPT Agent and the GPO (if used).
Rebuild a WAPT Windows Agent.
Rebuild a WAPT Linux or MacOS Agent.
Update the GPO
3.4. Migrating the WAPT server from Debian 12 to Debian 13: Procedure for updating the PostgreSQL database
When you upgrade your waptserver to Debian 13, modify /etc/apt/sources.list to switch to trixie then follow the procedure below.
Debian Trixie now integrates nginx spnego module, which conflicts with the one Wapt was shipping for Debian 12 and earlier. To avoid upgrade errors, please use the following procedure:
systemctl stop waptserver nginx
systemctl mask nginx
export DEBIAN_FRONTEND=noninteractive
apt-get update  && apt-get upgrade -y && apt-get dist-upgrade -y
apt-get purge -y libnginx-mod-http-auth-spnego
apt-get install libnginx-mod-http-auth-spnego
unset DEBIAN_FRONTEND
systemctl  unmask nginx
systemctl  start nginx waptserver
Upgrading the PostgreSQL database to version 17:
Wapt uses PostgreSQL as a database backend. PostgreSQL database binary format on disk changes between major version, and it is necessary to run a script to dump and restore de database when doing major upgrades. When upgrading Debian from one major version to another, PostgreSQL version also changes and it is thus necessary to run the appropriate script to run the right version. In order to streamline the upgrade process, Debian keeps the old PostgreSQL version running after major os upgrade (from Bookworm to Trixie for example). So you may still have an old PostgreSQL database running even after major debian upgrade, so be sure to follow these steps to upgrade you PostgreSQL database.
Note
Use the following command to check your current PostgreSQL cluster version:
pg_lsclusters
If your output shows:
Ver Cluster Port Status Owner    Data directory              Log file
17  main    5432 online postgres /var/lib/postgresql/17/main /var/log/postgresql/postgresql-17-main.log
Your database is already running PostgreSQL 17. No further action is required.
If your output shows:
Ver Cluster Port Status Owner    Data directory              Log file
15  main    5432 online postgres /var/lib/postgresql/15/main /var/log/postgresql/postgresql-15-main.log
You need to upgrade to PostgreSQL 17. Follow these steps:
Optimize the Database and Check Disk Space
Before upgrading, optimize the database and verify its size to ensure you have enough disk space:
sudo -i -u postgres psql wapt -c "VACUUM FULL;"
sudo du -sh /var/lib/postgresql/15/main
Backup the Database
sudo -iu postgres pg_dump wapt > wapt_backup_$(date +%Y-%m-%d).sql
Ensure Sufficient Disk Space
You need approximately 3 times the disk space of your current database before running the following commands:
Upgrade PostgreSQL to Version 17
pg_dropcluster --stop 17 main
pg_upgradecluster -v 17 15 main
apt remove postgresql*-15